Landscaping and Gardening Services in Pismo Beach and SLO County
Mon-Sat: 7:00AM - 5:00PM
08 Feb 2023

Easy Ways to Remove Weeds from Patios and Pavers

Easy Ways to Remove Weeds from Patios and Pavers

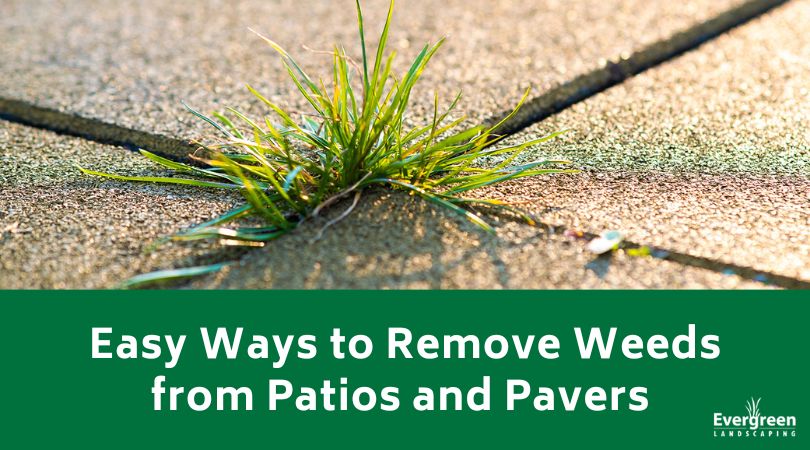
You want your pavers to look nice, but weeds can make this a challenge when they start popping up in the cracks. To make matters worse, different weeds have varying root systems, so getting rid of them for good can be difficult. We want your walkways or paths to look nice, so we’re going to highlight several easy ways to remove weeds from your pavers or patio below.

1. Boiling Water

Pouring boiling water on the weeds is a quick and easy way to remove them from the cracks. This trick works nicely for stubborn perennial weeds like dandelions. Start by pulling or cutting the leafy tops off, and then carefully pour the boiling water into the cracks. Some perennial weeds can come back, but they should die off after two or three treatments.

2. Vinegar

Vinegar can be a good option to remove young perennial or annual weeds, but it won’t work well to kill off established perennial weeds. Also, vinegar will alter the soil’s nutrient composition and make it harder for things to grow, so you must be careful when applying it. Remove the upper leafy portion of the plant first and pour the vinegar directly into the cracks. You want to use white vinegar instead of red because red vinegar can stain the pavers.

3. Good Pointing

If the soil between the pavers is loose, it is easier for the weeds to push through it. First, remove the weeds with any tool you like to give yourself a clean working space. Dig out the soil or hit it with a quick blast of water from the pressure washer. Next, pour polymeric sand into the cracks, ensuring you brush off as much from the paver or patio surface as possible. To finish, wet the sand with your hose on a light mist setting to make it compact and seal.

4. Weeding Knife

One of the best ways to eliminate weeds in this problem area and keep them out is to weed between the pavers or around your patio routinely. You can get a weeding knife or tool and move along the spaces, scooping the weeds out. You do want to get the root system when you pull the weeds to reduce the chances of them returning. You can find long-handled knives if you have a bad back, and you may want to get something to kneel on while you work.

5. Grow Ornamentals

Weeds won’t grow well if there is steep competition for space in your paver cracks or around the patio. These areas can also look bleak if the stone covers a large area or isn’t a soft color. A nice way to add life to the space is to plant ornamental plants in and around any cracks. Consider adding trailing bellflowers or Mexican fleabane in low-traffic areas and creeping thyme or bugle in areas with more people walking by and on them.

Evergreen Landscaping Can Help with Your Weed Problem

Pesky weeds can be an ongoing battle, especially if you want a neat and tidy yard. If you’ve tried our methods and you’re still having weed problems, contact us. Our staff is happy to come out, survey the situation, and help you get rid of your weeds once in for all.

11 Jan 2023

What is a Tapestry Lawn and How to Care for It

What is a Tapestry Lawn and How to Care for It

A tapestry lawn is a term for a popular landscape trend. You may hear it referred to as a meadow lawn, matrix garden, patchwork lawn, or prairie lawn. This setup requires removing your traditional grass and replacing it with a mix of flowers and native plants in different sizes, heights, and textures. Tapestry lawns bring both ecological and aesthetic benefits to your space too.

Defining Tapestry Lawns

As the name implies, a tapestry lawn has a mixture of colorful plants that work to create a pretty piece of art. Most homeowners choose to go for low landscapes, and this lawn can vary in height. It can have lower options that sit between 6 and 10 inches, but you can have your plants’ sizes up to 48 inches, depending on your goals. Generally speaking, your landscape will have plants that offer movement, fill in any gaps, and show a new arrangement from season to season. However, the main difference between a wild setup and your lawn is that you pick the plants for your space with environmental, practical, and aesthetic value.

How to Care for a Tapestry Lawn

Generally speaking, you won’t have to do much maintenance every month if you pick out the right native plants for your climate. Instead, most of the maintenance will be at the start of the season for a small clean-up. Then, you’ll have to turn your sights on mowing, trimming, and picking the best plants.

Choose the Best Plants

Tapestry lawns aren’t one zone or size fits all. When you work inside this landscape, the plants you pick out should grow natively to your area, have low water needs, and be non-invasive. In addition, all the plants you pick out should have similar light, water, and humidity needs, so they all thrive.

To create a flourishing tapestry lawn, you’ll want to choose colorful plants for ground covering, like Moonshadow Euonymus, Japanese Spurge, or Angelina Stonecrop. Since this setup usually doesn’t have any ornamental grasses, you’ll want to put a selection of plants to cover the ground that is resistant to foot traffic and aesthetically pleasing to pull off the lush, full look.

Mowing and Trimming

It’s possible to mow your tapestry lawn using a string trimmer or a mower on the highest setting. If you have a sandy area in your yard, you’ll want to skip it and leave the trimmings in place. You want to make a point to rake the debris out for spots that get more sun.

The idea with tapestry lawns is to allow the plants to take the lead and guide how you maintain your space. You may need to make minor changes, like replacing plants or removing ones that seem too aggressive for the area. However, these lawns generally need much less when it comes to weekly lawn mowing. They all require fewer resources once your plants establish themselves. You won’t have to worry about aerating, watering, or fertilizing.

Evergreen Landscaping Can Help Set up Your Tapestry Lawn

Do you want to set up a tapestry lawn in your yard, but you’re not sure where to start or which plants to choose? If so, contact us. Our staff is ready to set your tapestry lawn up for success and reduce your yard maintenance this season.

07 Dec 2022

The Best Way to Lay Mulch

The Best Way to Lay Mulch

While mulching your landscape can seem simple at first glance, there is more to consider if you want your labor and time to turn into a pretty landscape with healthy plants. Our quick step-by-step guide will tell you how to lay mulch and give you plenty of tips to use along the way.

Step One – Figure Out How Much Mulch You Need

 The first thing you should do is figure out how much mulch you need. To do this, you must figure out your flower beds’ square footage. You’ll do this by multiplying the width and length of each one. The average step you take is 2.5 feet long, so walk along the edge of the beds and count the steps you take along the length and the width.

  • Total Length – 2.5 x the number of steps
  • Total Width – 2.5 x the number of steps

Once you get the total square footage, you’ll need to figure out how many bags of mulch you’ll need.

  • Two Cubic Foot Bags – Square footage divided by 12 to get the number of bags needed to put down a two-inch layer of mulch.
  • Three Cubic Foot Bags – Square footage divided by 18 to get the number of bags needed to put down a two-inch layer of mulch.
  • Bulk – Square footage divided by 128 to get the amount of bags needed to put down a two-inch layer of mulch.

Step Two – Gather Your Tools

 Once you know how much mulch you’ll need for your garden beds and you buy it, you’ll have to get your tools. You’ll want to get a pitchfork, shovel, wheelbarrow, rake, and gloves. Having everything on hand will help the project go smoothly from start to finish.

Step Three – Clean the Beds Out

 Remove any debris, dried-up leaves, old mulch, and sticks from the beds. Take time to clean up the bed edging along the beds, and use a spade to cut a defined, clean line between the lawn and bed.

Step Four – Water the Beds

If you haven’t had any rain in the area and the beds are dry, water them. The mulch will help to retain moisture. Before you water the beds, you may want to apply a pre-emergent herbicide to prevent weeds from poking through.

Step Five – Remove any Weeds

Clean out any weeds you spot in your garden beds. Remember, the main benefit of mulching is that it suppresses weed growth, so you shouldn’t have to weed the beds nearly as much.

Step Six – Spread the Mulch

Shake the mulch from the bag or shovel it from your wheelbarrow into small piles. Put on gloves and use your hands to spread the mulch, especially as you get close to your plants. The mulch should be two to four inches thick because weeds will push through if it’s too thin. On the other hand, if the mulch is too thick, water won’t reach the soil. Once you finish, you can water the mulch to help it settle into place.

Contact Evergreen Landscaping

Not sure how much mulch you need? Maybe you don’t have time to lay mulch yourself. Whatever the reason, our professional staff is here to help. Reach out and contact us to set up an appointment.

09 Nov 2022

Everything You Need to Know About Clover Lawns

Everything You Need to Know About Clover Lawns

Clover lawns recently exploded in popularity on TikTok, and they’re the newest trend in heat-tolerant, drought-friendly, and eco-forward landscape designs. People add clover to their lawns to help offset common issues they have with their lawn as a result of climate change. However, before you jump on this trend yourself, you’ll want to know more about it. So, we’ll highlight the important parts of clover lawns below.

Defining Clover Lawns

A clover lawn is either a mix of traditional turf grass and clover or exclusively clover. Clover is a legume, which means it will draw nitrogen from the air and into the ground, which is very beneficial to the grass, soil, and nearby plants. Also, adding clover means you won’t need to fertilize.

Planting Zones for Clover Lawns

Depending on the species, your clover lawns can thrive in USDA planting zones 3 to 10. It does very well in areas like Texas and California, as they offer dry summers and mild winters. Dutch White Clover is very popular; it spreads and grows rapidly when you start it in the spring. Generally speaking, clover grows best in full sun, especially in zones six to nine. You want to check with your local nursery to see which clover cultivar will work in your climate before you buy it.

How to Plant a Clover Lawn

You may already see some clover scattered throughout your lawn, but the real trick is getting a fuller thatch. To do so, it all boils down to consistent work.

  1. Figure Out the Correct Planting Time
    Spring is the best time to plant your clover. After the first frost passes for the season, mow the lawn. At this point, if your soil’s pH levels aren’t between six and seven, you can amend the dirt by adding fine sand.
  1. Check the Soil
    You have to check and prepare your soil before you plant your clover. Once you do, you’ll want to plant your clover seeds and water them thoroughly until they establish a root system. They grow best in loamy or sandy soil with a pH range of six to seven.
  1. Plant the Clover
    Mix the clover seeds into the sandy loam soil while making sure you cover the whole area. Next, lightly rake the area where you seeded your clover, and water it every day for 10 to 14 days until the seeds start to germinate. Once the seedlings grow leaves, cut back on your watering as you now have an established clover lawn.

How to Care for and Maintain Your Clover Lawn

Once the clover establishes itself, you can sit back and relax. Clover won’t need nearly as much mowing as a traditional lawn, and you shouldn’t have to apply any herbicides or worry about pests. Also, clover won’t turn yellow when your pets go to the bathroom like a traditional lawn will.

Mow Sporadically

As long as your clover gets four to six hours of sun every day, it usually maintains itself. You’ll mow it roughly three or four times every year, but you can adjust this based on your preferences. If you’re after the English garden aesthetic, you can let the clover grow to the maximum height of eight inches.

Contact Evergreen Landscaping

If you want to know more about a clover lawn or get help establishing this lush, green look in your own yard, contact us.

12 Oct 2022

A Useful Guide to Companion Planting

A Useful Guide to Companion Planting

Companion planting is learning how to grow different vegetables or plants together for mutual benefits. There is a mixture of herbs, plants, and vegetables that all grow well together, but some will bully others. So, looking at this quick guide to give yourself a solid idea of how companion planting works is a good idea.

Companion Planting Cheat Sheet

Before considering companion planting, rotate your crops. Don’t plant the same garden crop in the same spot for more than one year because this can lead to disease spread, pest issues, and nutrient imbalances. If you rotate your crops and you’re ready to companion plant, the following list can help:

Beans

Broccoli, cabbage, carrots, cauliflower, corn, cucumbers, peas, potatoes, radishes, squash, and tomatoes

Carrots

Beans, peas, lettuce, onions, and tomatoes

Corn

Beans, cucumbers, peas, melons, potatoes, and squash

Cucumbers

Beans, beets, corn, onions, peas, and radishes

Peas

Beans, carrots, corn, cucumbers, eggplant, peppers, radishes, spinach, and tomatoes

Garlic

Beets, brassica, carrots, eggplant, peppers, potatoes, and tomatoes

Lettuce

Corn, pumpkins, and squash

Potatoes

Beans, brassica, corn, lettuce, radishes, and spinach

Tomatoes

Basil or other herbs, carrots, squash, and cucumbers as part of a three-way companion partnership

Herb Companion Planting

Not every garden is big enough to grow a range of crops needed for companion planting. However, this doesn’t mean that you can’t take advantage of herbs’ benefits, like repelling or trapping pests and attracting pollinators to the area. A few culinary herbs that can help repel pests and protect your crops using companion planting include but are not limited to:

  • Basil
  • Chives
  • Cilantro
  • Lavender
  • Mint
  • Rosemary
  • Sage
  • Thyme

Ideally, the goal is to allow your herbs to bloom, as this is when they’re at the most fragrant stage. In turn, this is when they do their best to repel pests, and they may even work well to repel deer or rabbits from your vegetable garden.

Companion Planting Mistakes to Avoid

Just like there are plants that play nicely together, there are those that clash. Generally, plants that compete for the exact nutrient needs, like space, sun, or water, shouldn’t be companion plants, either above the ground or at the root level. Likewise, crops with issues with the same plant diseases, like blight, shouldn’t be companion plants. You want to spread them out as far as possible to prevent them from spreading, and the same rule applies to plants with the same pest issues.

Also, some crops will stunt the growth of other plants. Fennel is a very popular example of a poor companion plant that you want to give its own spot in your garden a decent distance away from other crops. This stops it from slowly taking over and taking out your other plants.

Contact Evergreen Landscaping

Do you have more questions about companion planting? Maybe you’d like help setting up the perfect garden space. Whatever the reason, contact us. Our staff is happy to answer your questions and set up the perfect companion planting setting in your yard.

28 Sep 2022

Six Invasive Shrubs to Stay Away From

Six Invasive Shrubs to Stay Away From

No matter if you’re maintaining the garden you already have or working on building up a new one, it’s essential to know which plants can be more of a hassle than a benefit to your space. Below, we’re going to go over a few shrubs that are widely considered to be invasive, and while they may look pretty, you want to stay far away from them.

  1. Autumn Olive (Elaeagnus umbellata)
    Originating in the eastern portion of Asia, this shrub can get up to 20 feet tall and it thrives in zones four to eight. It’s a very hardy plant that grows where other plants fail. However, this determination, means that it spreads very quickly and can take over your garden. You also have to watch for sharp thorns when you’re around it.
  1. Common Gorse (Ulex europaeus)
    Even though this plant is covered in pretty yellow flowers every year, this isn’t enough to cover the fact that it’s a very noxious weed. There are also very high oil levels in this plant, and this makes it more prone to issues with fire. However, this plant has adapted and now grows even faster after it survives a fire. This plant is another one that is covered in sharp thorns.
  1. English Holly (Ilex aquifolium)
    English holly grows best in zones six to nine, and it’s a medium-sized tree or a larger dioecious shrub that gets between 10 and 50 feet tall. The red fruit is the star of this plant in the colder months, but it also means that you’ll have a ton more of this plant popping up. The leaves are very spiny and sharp, and the male cultivars don’t produce any fruit.
  1. European Cranberrybush (Viburnum opulus)
    The name of this invasive shrub references the fruits as they look like a traditional cranberry. After they eat the fruit, birds spread the seeds to help the shrub spread very rapidly. However, it also helps to attracted the viburnum leaf beetle, and they can cause more damage to the surrounding plants. It’s native to Asia and Europe, and this invasive shrub grows well in zones three to eight in part shade to full sun.
  1. Japanese Spiraea (Spiraea japonica, Spiraea japonica var. alpina or Spiraea bumalda)
    This invasive shrub is an imported variety that tends to endanger and take over native spiraea. The main reason why it’s invasive is because it’s so hard to control in landscape designs because the seeds can be dormant for many years. In turn, it’s almost impossible to get rid of completely. It gets up to six feet tall, and this shrub grows best in zones four to eight. It will produce flowers when you plant it in full sun, and this increases the spread.
  1. Multiflora Rose (Rosa multiflora)
    Originating in the eastern portion of Asia, this invasive shrub has stems that will root and widen the original bush anywhere they touch the ground. In turn, the shrub can spread extremely rapidly and take over your garden. It can even form a vine in some cases to help extend the reach and shade out your other plants.

Contact Evergreen Landscaping

Do you want to know more about invasive shrubs to avoid? Maybe you already have some in your yard and you want help removing them. Whatever the reason, reach out and contact the professionals at Evergreen Landscaping today.