Landscaping and Gardening Services in Pismo Beach and SLO County
Mon-Sat: 7:00AM - 5:00PM
11 May 2022

Smart Watering Tips for Your Garden

Smart Watering Tips for Your Garden

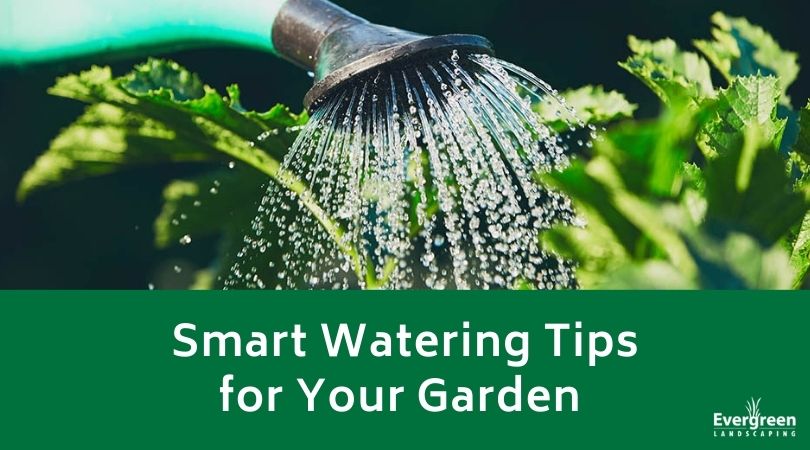
Learning how to water the plants in your garden can help you conserve water, and it’s better for the plants as a whole because some require less water than others to thrive. You can do several things to water your garden in a smart way, and we’ll outline several great tips below.

  1. Water at the Correct Time
    Did you know that there’s a correct time to water each day? When you choose to water will make a big difference in how much water your plants can absorb. Watering your garden very early in the morning will allow them to absorb the water before the heat of the day causes it to evaporate. Also, any water that gets on the plant’s foliage will dry before nightfall, and this reduces the risk of fungal infections and slugs.
  1. Aim the Water Carefully
    If you’re watering your garden by hand; you want to aim your water stream right at your plant’s base where they need it most. This helps to keep your foliage dry, and it can prevent it from scorching in the sun. Also, giving your plants a very good soaking every now and then is much better than watering them often but lightly. Soaking them encourages an extensive and strong root system.
  1. Mulch Regularly
    Many people like how mulch looks in the flower or garden bed, but mulch also serves a very functional purpose. Adding a one to three-inch layer of mulch around your plants keeps the soil and root system cooler. It also slows how quickly the water evaporates, and this can reduce how much you have to water in the hotter summer weather. The best mulch is a well-rotted organic matter with grass clippings, and compost will nourish your plants too.
  1. Collect Rainwater
    If you have a large garden, you can easily spend a decent amount of money each year to keep it well-watered. To offset this, get rain barrels and collect rainwater to use in your garden. You can collect rainwater from your greenhouse, house, or garden shed. You do want to make sure that you put the barrels close to wherever you’re going to need it, so you don’t have to haul water long distances.
  1. Practice Selectively Watering
    You should only water when your plants really need it. Since it can be difficult to judge by looking at the soil, you can get a smaller trowel and dig a small hole by your plants. If the soil is dry a few inches down, this is a good indicator that it’s time to water. Also, try to group plants with the same water needs together, so you only have to water parts of your garden periodically.
  1. Remove the Weeds
    Weeds present stiff competition for your plants for resources, including water. To prevent this, you should make a point to go out a few times a week and remove any weeds you see. Your plants will get more water and nutrients to grow, and you won’t have to worry about feeding and watering the unwanted weeds.

Contact Evergreen Landscaping

Do you want more watering tips? Maybe you want to install an irrigation system to make the watering process easier. Contact us, and we’ll work with you to ensure that your garden thrives while you save water.


27 Apr 2022

What is Soil Blocking?

What is Soil Blocking

For nearly a century, the Dutch have been developing and refining soil blocking. In Central America, planting a variety of seeds in soil blocks dates back nearly 2,000 years. But, what is soil blocking, and how does it help your plants?

Defining Soil Blocking

Soil blocking is exactly what it sounds like. When you use this planting method, you use the potting mix as both the growing medium and container for your seeds. You use blocking tools to create compact soil blocks to add your seedlings in. Since most plant roots evolve to grow in the soil where it’s dark, they will air-prune the roots and grow back into the soil block instead of sticking out into the air. In turn, this maximizes the soil volume and stops your seedlings from becoming stunted and root-bound.

How to Use Soil Blockers

You’ll need the soil blockers themselves with a set of two inserts. You can get mini inserts or larger ones for this project. You’ll also need potting soil, and the best type to have is soil that is a mix of half soil and half peat moss or coconut coir. Get a tub and fill it with the soil, and have tap water on hand to rinse the blockers between each set. Finally, bottom trays are a must to hold your seed blocks, and you’ll also need your seeds.

  1. Get the Potting Mix Ready
    Pour your potting mix into your shallow tub and add enough water to make it moist. If you squeeze the soil, it shouldn’t drip, but it should feel wet.
  1. Fill Your Soil Blockers
    Once the soil is ready, fill the soil blockers. You want to dig them down into your potting mix and really pack it in. Gently shifting the blockers from side to side will help compact the soil more. You can also manually fill each block. Once you’re sure the blocks are nicely compacted, scrape any excess off the bottom.
  1. Release the Blocks
    Place your blocker on your seed tray or flat sheet and release your potting blocks. The goal is to get tightly compacted soil blocks that stick together and don’t crumble or slump over when you release them. Rinse the blockers between each set to get more consistent results.
  1. Add Your Seeds
    Now that you have your blocks of soil, it’s time to add one to two seeds per block. You should sow them two times their depth. Any plants that like extra heat to grow will love this method, including peppers, eggplant, tomatoes, and ground cherry tomatoes. You’ll want to water your seed blocks from the bottom, so place them in shallow trays that make it easy to pour water in. Allow the top millimeter of each block to dry before you water it again to prevent mildew.

Contact Evergreen Landscaping

Do you want to know more about soil blocking? Maybe you have questions about the process, or you’re unsure if this method will work well for your needs. Whatever the reason, we encourage you to reach out and contact our professional staff for assistance. We’re happy to start your garden off on a strong note.

30 Mar 2022

Can Plants Help Indoor Air Quality?

Can Plants Help Indoor Air Quality

Houseplants can brighten up a room and make it much more inviting. However, can they clean the air and make it healthier for you to breathe? If so, are some houseplants more beneficial than others? We’ll break it all down for you below.

Why Do People Believe Houseplants Clean the Air?

In the late 1980s, NASA published a study by their scientists that claimed some houseplants were effective at removing small amounts of volatile organic compounds or VOCs from the air. This caught on because it’s common for household items like nail polish, drywall, shampoo, and virtually anything with a scent to release small amounts of VOCs. The harmful effects of these compounds range from mild respiratory inflammation to developing nasopharyngeal cancer.

Naturally, people took this study and ran with it. Today, it is still widely believed that houseplants can help clean the air a small amount. However, they’re not going to be able to handle huge amounts of VOCs or other pollutants. Also, some plants are more effective than others at removing air contaminants. So, if you want to improve your indoor air quality slightly, you can start keeping a few indoor plants. As a bonus, they can boost your mood.

Plants That Work Well to Purify the Indoor Air

Since there are thousands of plants you can choose from to have in your home, you want to concentrate on the ones that help with your indoor air quality the best. These plants include but are not limited to:

1. English Ivy (Hedera helix)
English Ivy is beautiful as a houseplant and a groundcover, and it offers an elegantly classic look while removing harmful chemicals from your air. You can grow it in full sun or full shade and train it to grow in different shapes. It can easily survive for years with the proper care, and it’s an excellent beginner plant.

2. Chinese Evergreen (Aglaonema modestum)
Chinese evergreen is a very low-maintenance plant that grows best in medium or low lighting conditions. It will get between one and two feet high at full maturity, and it offers larger leaves that droop down. It comes with speckled leaves that are deep green with pink or yellow splotches. However, the leaves contain an irritant if you touch them with your bare hands, and they can be toxic to pets.

3. Dragon Tree (Dracaena marginata)
The leaf color on this pretty houseplant ranges from purple to green, and they grow in longer and thinner spikes on top of a woody stem. They make a gorgeous outdoors or indoors, and it works wonderfully in an office setting under harsh fluorescent lighting because it tolerates low light well. It needs well-draining but rich soil to be happy and healthy.

4. Mother-in-Law’s Tongue (Sansevieria trifasciata ‘Laurentii’)
Finally, this is another indoor plant that is excellent for beginner gardeners because it’s very hardy. It’s a succulent that can tolerate neglect and drought very well. It also isn’t picky about temperature or light, so that you can place it just about anywhere in your home. You want to be careful not to overwater it or keep the roots soggy.

Contact Evergreen Landscaping

If you’re not sure which plants will help purify the indoor air or how to care for them, contact us. We’re happy to help you pick out the perfect cheerful plants to add a splash of green to your home and help purify the air.

16 Mar 2022

Alternatives to Chemicals for Weed Control

Alternatives to Chemicals for Weed Control

Crabgrass and dandelions are the banes of many gardeners and homeowners once summer is in full swing. These eyesores can distract from your space, so you want to eliminate them. However, you don’t want to use chemical weed killers. Standard household supplies can help you get rid of the unsightly weeds to the root without dousing the area in chemicals. We’ll go over a few of our favorites below.

  1. Landscape Fabric
    Ideally, your weed control routine should start before you see the weeds growing. Consider adding a layer of landscape fabric right to the ground with a layer of straw or mulch over it. The landscape fabric acts like a physical barrier that stops unwanted weeds from sprouting and taking hold. They can’t get any air or sunlight, and the mulch adds a nice splash of color to your garden or flower bed.
  1. Salt
    At the end of winter, stock up on discounted rock salt to sprinkle on your garden paths to fight the weeds when the weather warms up. Table salt will also do the trick if you can’t get rock salt. Salt also works for an excellent weed barrier in spaces where your lawnmower can’t reach or in lawn edging. However, you want to apply it carefully because salt can erode concrete and leave the ground bare for years.
  1. Vinegar
    If you douse your weeds with vinegar, it’ll kill them quickly. You want to try to get the horticulture-grade vinegar because it offers 20% acetic acid. Vinegar is a non-selective weed killer, though, and this means that it’ll kill anything you splash it on, be it weeds or flowers. Additionally, since vinegar is acidic, it can lower the pH value in the soil, and this can cause problems with growing plants that need a higher pH level, like lilacs or crocuses.
  1. Lemon Juice
    If you douse unwanted weeds with lemon juice, they should start to die in a few days. Take 12 ounces of tap water and add it with the juice from one freshly squeezed lemon. Put it into a spray bottle and spray the weeds or problem areas. You most likely won’t need a second application due to the acid content. However, it can also kill grass and any surrounding plants, so use it with care.
  1. Essential Oils
    Essential oils have a very large usage range, from pest control and mold to bed bug and mosquito prevention. They’re also a handy weed killer. Mix 10-15 drops of clove or cinnamon oil with 12 ounces of water in a spray bottle and spritz your weeds with the solution. They’ll take care of them with a few applications. Make sure to only get it on the items that you want to kill, though, as they can also damage flowers and plants if you’re not careful. You can also mix it stronger with more oils if you don’t mind the scent.

Contact Evergreen Landscaping

If you’re wondering about weed control alternatives to pesticides, contact us. Our friendly and professional staff will suggest a few items for you to help you take care of any weeds in your yard or garden and leave it looking lush, full, and green all season long.

16 Feb 2022

Trendy Landscaping Ideas for 2022

Landscaping Ideas for 2022

According to a recent report, nearly 80% of people say that a lawn is one of the top features they consider when buying or renting a home. It’s also one of the chief factors they evaluate when surveying someone else’s property.

People will notice your lawn. It’s up to you to decide whether it catches their eye for the right reasons! As we start 2022, there’s never been a better time to try out some on-trend landscaping ideas.

Today, we’re sharing some of the top designs that are already making waves, and how you can incorporate them into your own outdoor space. 

  1. Indoor/Outdoor Shared Spaces
    For years, we’ve headed in a decor direction that favors shared indoor/outdoor living spaces. Open-concept homes have long dominated the scene, shadowing more traditional layouts that feature separate, compartmented rooms.

    In 2022, look for this trend to continue, in a big way. Gone are the days when backyard patios were reduced to nothing more than a sun-worn loveseat and a charcoal grill. Now, these areas are as amenity rich as any well-appointed room, with features that include outdoor kitchens, entertainment centers, fire pits, and much more.

    As such, savvy homeowners are looking for ways to incorporate their landscape design into these new hybrid areas. One way they’re doing so is through the use of hardscape features that are as beautiful as they are functional. Against neat and minimalist landscaping, stone patios, walkways, and retaining walls add a warm dimension that elevates the entire scene. 

  1. A Rise in Pollinator-Friendly Native Plants
    Pollinators include birds, bees, butterflies, and even beetles. As they travel from one flowering plant to another, they carry pollen on their bodies. This exchange enables them to transfer valuable genetic material that supports the reproductive systems of those plants.

    In turn, the plants provide fruits, vegetables, and nuts for us to consume, as well as oils, fibers, and raw materials for goods. They also help prevent soil erosion. In fact, research shows that one in every three bites of food you consume is the direct result of a pollinator!

    This year, eco-conscious homeowners are looking for ways to attract more pollinating insects and mammals to their outdoor gardens and landscapes. This includes adding pollinator-friendly plants that are native to their local region. Interested Californians can learn more about these plants, which include California Asters, Redbuds, and Baby Blue Eyes, among others. 

  1. Incorporating Low-Water/Low-Irrigation Plants
    It’s no secret that weather can be inconsistent. Planting a ton of thirsty plants around your home can mean lugging out the water jug if you don’t receive the amount of rainfall you anticipated.

    For this reason, homeowners are incorporating more plants that don’t require as much water or extensive irrigation. This approach, known as xeriscaping, can save time as well as money. You can also consider gravel gardening, which eliminates the need for soil or fertilizer.

    There are many different types of plants, including succulents, cacti, and ornamental grasses, that thrive in these types of environments. In a drought-prone state like California, it’s a smart move to consider. 

  1. Adding More Garden Spaces
    While a pristinely landscaped yard looks incredible, it can require a solid amount of upkeep. From mowing and fertilization to weed control and pest removal, there are plenty of different requirements to keep you busy.

    If you have a qualified local landscaping company to take care of the work for you, then those needs might not seem so insurmountable. However, most homeowners are looking for ways to achieve a beautiful outdoor space in a cost-effective and practical way.

    For this reason, 2022 is poised to become the year of garden spaces. By swapping even a small landscaped plot for a gardening area, you can cut down on the time and work required to keep your exterior looking great. If you really want to conserve your spare time, then consider hiring a professional gardener to do weekly, bi-monthly, or monthly services!

    Don’t have a ton of land to harvest your own herbs, fruits, and vegetables? No problem. Space-conscious homeowners can use container gardens, vertical gardens, and raised beds to transform their patio spaces into grow zones. 

  1. Pet-Friendly Landscapes
    In 2020, pet industry sales exceeded $100 billion for the very first time. This surge is due in large part to the COVID-19 pandemic and the rise in time spent at home.

    While you may already be eyeing ultra-durable furniture to withstand those inevitable puppy gnaws, did you know that you can also make your exterior equally pet-friendly? For instance, you can install synthetic turf and encourage Fido to mark his territory there, saving your grassy areas from those unsightly dead spots that can occur after repeat offenses.

    At the same time, adding artificial turf also help you reduce or eliminate watering and maintenance expenses. Some California homeowners may even be eligible to receive a rebate from their local water authority!

    In addition to this design decision, other ways to create a lawn that your four-legged friend will love include:

  • Installing a fence
  • Adding a designated dog run area
  • Choosing pet-friendly ground covers (e.g. smooth stones, mulch)

    Your landscaping company can also help you choose pet-safe plants, shrubs, and flowers that won’t be poisonous if your furry pal ingests them. You can check out this list for more information on the best and worst plant species to pursue. 

Try These Landscaping Ideas at Home

We might be in the middle of winter, but it’s never too early to start planning your lawn and patio spaces. As we round the corner into 2022, these landscaping ideas are a great way to get inspired and motivated!

Whether you want to totally transform your backyard into a pollinator oasis or you’re envisioning a water-free gravel garden, we’ve got you covered. The team at Evergreen Landscaping is well-versed in a range of different services including landscaping, gardening, hardscape, irrigation, and more. 

Contact us today to learn more about the services we can provide and let’s get started!

02 Feb 2022

Why Pruning Trees and Shrubs Is Necessary

Why Pruning Trees and Shrubs Is Necessary

The keys to pruning your trees and shrubs effectively are using the right tools, simple techniques, and the correct timing for each plant species you want to keep healthy. However, before you take any sharp tools to your beloved trees and shrubs, you should understand why you’re pruning them in the first place. Every cut you make will alter your plant’s growth and shape, so we’re going to outline several reasons why you should read up on pruning your trees and shrubs below.

Better Growth

Pruning a growing tree or shrub stimulates new growth production. So, if you’re looking to get some vigorous new growth on a tree or shrub, you should prune it a lot. Consider pruning in this fashion when you have a tree or shrub that has a weak growth section, like in the back. If you’ve ever pinched back new growth with your fingers on smaller plants, you’ve pruned them.

Size Restriction

If you live in an area with restricted space, pruning your trees and shrubs can ensure that they don’t get out of hand and take over. Gardeners who live in suburban or urban areas usually have to do some type of pruning to keep the shrubs and trees from outgrowing the garden, yard, or pot. Root pruning is another option that can help you restrict your container plant’s size.

Structural Soundness and Improving Health

Any injured, diseased, dead, or dying branches should get pruned away to keep your tree or shrub healthy. If your branches rub together, you should prune them to get rid of the possibility of damaging the main branch. Maintaining your tree’s structural soundness usually comes down to good pruning practices. You have to be careful not to top the tree because topping can make it prone to pests and weak. It can also slowly start to kill your tree over a number of years.

Encourages Fruit and Flowering

Pruning is a great way to coax small growth spurts for fruit and flowers on your trees or shrubs. You encourage strong flower buds when you prune things. You can easily prune them lightly during the summer to give the tree or shrub better air circulation around the fruit. This will reduce the chances of fruit diseases developing while encouraging the fruit to ripen faster.

Protects Property and People

Any trees that are by sheds, homes, play structures, or other buildings pose a threat to your safety if the tree falls, or heavy branches snap off. They can also negatively impact power or telephone lines, and pruning can help keep the property, pets, and people safe.

Improves Appearances

A lot of people’s top priority when they prune their plants is to improve the look of the garden or yard. Removing unwanted, dead branches and suckers creates a nice shape. It also leaves your plants looking tidy and neat all season long.

Contact Evergreen Landscaping

If you’ve never had to prune any shrubs or trees before, it can seem overwhelming to take this project on the first time. This is also true for people who have larger trees or shrubs around. You can contact the professionals at evergreen landscaping and allow our staff to come out, assess your situation, and prune your trees and shrubs to keep them healthy.

19 Jan 2022

How to Build a Beautiful Raised Garden

How to Build a Beautiful Raised Garden

There are several reasons why you’d want to build a raised vegetable garden. They sit above the ground inside of a frame that you make out of wood or another durable material. If your land has clay, sandy, or hard-packed soil, you can create the perfect growing environment for whatever flowers, vegetables, or plants you want to grow.

Plants get lifted out of the way of pests and pets or kids, and the soil will warm up much quicker and stay warmer for longer. This will extend your growing season and give you gentler conditions for delicate transplants and new seeds to thrive. Vegetables, fruits, and ornamentals will send deeper roots in to look for water, and this gives them a stronger foundation while improving their health. Raised beds also keep your yard neat and tidy. Best of all, it’s not a difficult project to make a raised garden bed. We’ll walk you through how below.

Step One – Gather Your Supplies

The beauty of this raised garden bed is that it’s easy to build and cost-effective. The rebar and wood you need shouldn’t cost more than $50.00 if you’re going to use untreated planks. You can complete the entire build from start to finish in a few hours. The untreated pine may only last between 5 and 10 years, but due to this build’s nature, each board is easy to replace when it breaks down without ripping the whole thing apart. To create a 4-foot by 8-foot raised garden bed, you’ll need:

  • Two 2-foot by 12-foot planks cut into 8-foot sections
  • Two 2-foot by 12-foot planks cut into 4-foot sections
  • 12 pieces of 2-foot rebar
  • Cardboard or newspaper
  • Rubber mallet
  • Soil

Step Two – Position the Boards

Find a level section of ground and lay your boards down so the inner corners touch. Stand a single long board up on the side and hammer two pieces of rebar a foot from each corner with your rubber mallet. The rebar should go a few inches into the ground.

Step Three – Prop up Your Short Sides

Get a piece of rebar for the center of each for the temporary supports. Next, prop up your second long side and adjust your frame’s alignment as necessary. Hammer your rebar a few inches into the ground a foot from the corner of each second long side to secure it.

Step Four – Add Additional Support

Hammer your rebar pieces a few inches deep into the ground a foot from each corner of the short sides before removing the temporary supports. Add two pieces of rebar along each long side, two feet apart. This will help reinforce your frame when it’s full of soil. Next, hammer your rebar into the ground until 6 to 10 inches are sticking up above the ground level.

Step Five – Fill

Once you get the frame in place and supported, take your newspaper or cardboard and line the bottom of the frame. Get some water and wet it thoroughly. When you finish, fill your new bed with the soil until it’s a few inches from the top of the walls and plant your items.

Contact Evergreen Landscaping

If you’re like assistance or advice on how to create a beautiful and lasting raised garden bed, contact us today.

05 Jan 2022

Indoor and Outdoor Plants for Those without a Green Thumb

Indoor and Outdoor Plants for Those without a Green Thumb

You may love the look of houseplants or outdoor plants, but you may not

have a green thumb, and you’re worried about keeping them alive and healthy. If this is the case, you can start with some low-maintenance plants that take real effort to kill but look stunning. We’re going to list out several options for you below to get you started.

  1. Golden Pothos Vine (Epipremnum pinnatum)
    In this plant’s native habitat, it’s a tree-swallowing monstrosity that has huge green and yellow leaves. As a houseplant, it’ll grow very aggressively from trailing baskets or pots with very minimal care. They can root in a glass of water too. Put them in a place that gets partial sunlight with well-draining soil. Try to water them when the soil feels dry to the touch. If you forget, they’re drought-tolerant.
  1. Snake Plant (S. trifasciata or S. trifasciata laurentii)
    There are several varieties of this houseplant, and they like a large amount of light. However, they can survive in the partial sun without a problem, and they’re not too picky about watering as long as you don’t soak the soil. They do exceptionally well in an office environment, and you can easily divide the main clump to get smaller plants as it grows. You’ll get green on green bands with sword-like leaves.
  1. Lucky Bamboo (Dracaena sanderiana)
    This is a perennial office plant, and they can thrive in truly awful conditions. You can put them in a space with poor air quality, bad lighting, and forget to water it, and they’ll still thrive. As a bonus, a lot of people think that they bring a lot of good luck and enhance the energy in the space you keep them. You’ll get slightly longer stalks that you can train to twist around things, and they have bright green leaves.
  1. Pansy (Viola tricolor var. hortensis)
    Pansies are very pretty and hardy smaller flowers that thrive in a range of environments. You should plant them in a bright and sunny spot in the late spring months. Make a point to water them once or twice a week, depending on how hot it is. They do best in well-drained but moist soil, and they come in a huge range of colors with cheerful faces and smaller deep green leaves.
  1. Marigold (Tagetes)
    These plants originated in Mexico, and they’re the official flower of the Day of the Dead. They have vibrant colors with a stronger fragrance, and they’re also popular in Diwali or the festival of lights. They like dappled shade or full sunlight, and the soil must drain well. They like drier conditions, and you should only water them when the topsoil dries out.

Contact Evergreen Landscaping

Not that you know three hardy indoor plants and two hardy outdoor plants you can grow if you don’t have a green thumb, we’re happy to help you add to this list. You can contact us today for more information, and we’re happy to help you pick out a gorgeous and all but un-killable garden indoors and out.