Landscaping and Gardening Services in Pismo Beach and SLO County
Mon-Sat: 7:00AM - 5:00PM
03 Mar 2021

Themed Garden Designs

Does your garden have a theme? Maybe you’ve never tried to create a theme with your garden, and you have no idea where to start. At the core, a themed garden design is landscaping based on a specific idea or concept. There are several more well-known garden themes out there, including:

  • Butterfly gardens
  • Chinese gardens
  • Desert gardens
  • Japanese gardens
  • Wildlife gardens
  • Zen gardens

Arguably one of the hardest parts of this process is coming up with the central design idea. Once you pick out an idea that you like, everything else should gradually fall into place. The easiest way to go about this is to think of what you enjoy and let the concept grow from this thought process.

Your garden theme design can vary widely, and you’re spoiled for choice. The only limits to your theme are your imagination. However, this can also be overwhelming, so we’ll give you several theme ideas with examples of flowers you can incorporate into your own yard below.

Wildflower Themed Garden

If you love how wildflowers look, you can easily design a wildflower-friendly garden that you’ll fill with native plants. Depending on your location, bluebells, penstemon, lupine, and coneflower are all excellent picks. Maybe you love wildflowers, but you’re more of a night person. If this is the case, the moonflower, Casa Blanca lily, Queen of the Night, and Gardenia Augusta are all solid choices that bloom during the evening hours.

Color Themed Garden

Do you have a favorite color or colors? You could go for a cool green garden that showcases pops of vibrant yellow or orange blooms, or maybe you want a blue garden. Marigolds, yellow roses, sunflowers, lilies, tulips, and some daisies come in shades of yellow and orange. For a blue garden, try hydrangeas, larkspur, sage, bellflowers, or morning glories. Whatever colors you choose, you can incorporate them into your plant pots or borders too.

Elizabethan Themed Garden

Perhaps you’re someone who is into a more classic design with a calming look and feel. If so, you could incorporate carefully placed benches with deep green hedges framing the garden. Other nice classic touches are water features like fountains, statues, or even a low rock wall.

Consider Your Climate and Home Style

In the early stages of developing your garden theme, consider your local climate because this impacts what will and won’t thrive in your garden. For example, it would be challenging to have a desert garden in Florida, or you would have a challenging time creating a tropical-themed garden in the American Southwest.

Your home’s style will also impact which garden theme you choose. If you live in an older, stately home, incorporating a formal Victorian garden is a great fit. But, having a rock garden with this type of home could look out of place and impact your overall aesthetic.

Contact Evergreen Landscaping

Would you like help bringing your garden theme to life? Maybe you’re not sure which plants will do best in your local climate. Either way, our staff is here to help. You can reach out and get in touch with us to start the design process and get tips and advice.


19 Feb 2021

Six Best Houseplants for Low Light

Six Best Houseplants for Low Light

Most people think that they need a lot of sunlight with a green thumb to grow gorgeous houseplants, but this isn’t necessarily true. Yes, houseplants require some care, but you can find options that are forgiving, easy to care for, and that thrive in low-light conditions. Some houseplants even do better in shaded environments. If you’re looking for plants that like less like, we’ll outline a few for you.

  1. Devil’s Ivy

First up is the Devil’s Ivy. This plant is better known as Pothos. It gets the name because this is a very low-maintenance plant that grows vines in the worst possible conditions without a problem. It’s extremely hardy, difficult to kill, and it loves lower light conditions. However, it can choke out other plants around it, so be sure it’s the only plant in the container. This plant likes moderate moisture, but it can tolerate drought.

  1. Silver Pothos

This is another low-maintenance vine that features pretty heart-shaped leaves. This is a vining plant that has silver markings that can help make it stand out. The silver markings will get more striking and brighter in higher light conditions, but they can turn green in lower-light conditions. They do well in low lighting, and they’ll have a slightly slower growth habit.

  1. Dieffenbachia

This slightly larger plant does best in filtered light. So, if you have it by a window, try putting a barrier between it and the glass, like a curtain, to prevent burning. This is especially important in the spring in summer months when the plant grows new leaves. It produces light green leaves with a darker green border. This plant will grow upwards instead of spreading out, and the larger leaves drape gracefully.

  1. Spider Plants

This is a favorite plant for beginner gardeners because it’ll adapt quickly to different environments without damage. This adaptability also makes it easy to grow, and it’s easy to breed by cutting off small sprigs and rooting them. It does best in indirect light, and it’ll tolerate drought. It has long, thin leaves with a bright green stripe in the center.

  1. Calathea

Anyone who has pets or kids around their home will like this nontoxic addition. You get deep green leaves with flecks of red and pink to help liven it up. It loves moderate or low lighting conditions with lightly moist soil. The leaves grow upwards on slender stems to create an eye-catching look.

  1. ZZ Plant

If you want a unique plant to add a pop of bright green and texture to your space, try the ZZ Plant. You get thicker waxy green foliage that can also come in black shades, and it doesn’t like a lot of light or water. So, if you forget to water it for a while, it’ll bounce back without any damage.

Contact Evergreen Landscaping

Do you want more ideas on plants that like lower light conditions? If so, contact us. Our friendly and professional staff are ready and willing to help match your plants to your lighting conditions. We can also give you advice on how to keep each houseplant healthy and thriving in virtually any environment.


04 Feb 2021
Energy Efficient Landscaping - Five Tips

Energy Efficient Landscaping – Five Tips

Energy Efficient Landscaping - Five Tips

Green landscaping is exploding in popularity around the world as one of the biggest design trends. Going green with your landscaping, better known as eco-landscaping, means making it more energy-efficient. You create, design, and maintain your landscape in a way that saves you time, money, and energy. Energy-efficient landscapes offer a lot of benefits for you, but they also nurture wildlife while reducing water, soil, and air pollution. There are several things you can do to transform your landscape into an energy-efficient one, and we’re going to walk you through a few options below.

1. Add Trees for Natural Shade

Solar heat that gets absorbed through your roof or windows can increase your cooling costs. Shade stops a large portion of this heat from reaching these areas, and this helps reduce the time you have the air conditioner running. You can plant deciduous trees on the west and south-facing sides of your home is one great way to increase the natural shade levels. The leafy green canopy will shade your home in the summer, and the bare branches will allow the sun’s warmth through in the winter.

2. Hedges Create Windbreaks

Correctly sourced, selected, planted, and maintained hedges create excellent windbreaks that can reduce your overall heating costs. If you’re worried about chilly winter winds, plant these hedges on the northwest and north-facing sides of your property. Your windbreaks shouldn’t be more than one or two tree heights from your home to get the most protection possible. This can be far enough away to create a natural privacy screen for your backyard too.

3. Plant Ground Cover to Prevent Radiant Heat

When the sun beats down on the ground, it produces radiant heat that rises back up and makes the area warmer. To combat this, you can plant shrubs or plants that sit low to the ground and help to deflect the heat. Some do better in shaded areas, but there are many full sun varieties available that will sprawl over your yard and keep it cooler.

4. Reduce Your Water Needs

Watering your yard or landscape enough to keep it healthy while making sure you don’t waste water is a delicate balancing act. You should make sure that your irrigation system is in good shape at the start of the spring months. It’s also a good idea to find out exactly how much water your plants need to stay healthy and thriving. Combining these two factors will allow you to save on your water costs.

5. Use Energy-Efficient Lighting

If you have to have lights on in your landscaping, choose energy-efficient options. If you live in a sunny area, you could even check into solar lights. These types of lights will help to cut into your overall energy costs, and this is especially true if you have motion sensor lighting in place. Just make sure that your lighting will survive exposure to the elements without breaking down.

Contact Evergreen Landscaping

Would you like to create an energy-efficient landscape in your own yard? Maybe you already started the process, and you have questions or concerns. Either way, you can reach out and get in touch with our friendly and professional staff today.

25 Jan 2021
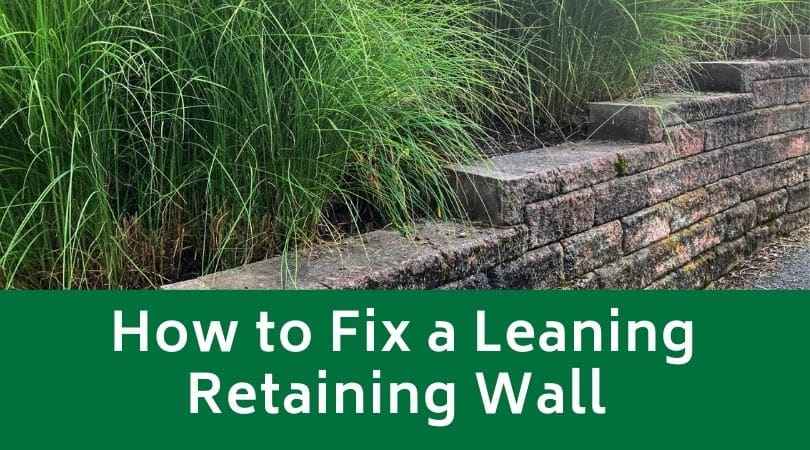
How to Fix a Leaning Retaining Wall

How to Fix a Leaning Retaining Wall

How to Fix a Leaning Retaining Wall

Retaining walls add structure and beauty to your yard. They also serve practical purposes like protecting your property from landslides, flooding, or other damage. Your retaining wall can fail over time due to a host of reasons. Maybe you have foundation problems, problems with the wall design, saturated backfill, or your current reinforcement isn’t in the correct position. Whatever the reason, a leaning retaining wall can be a large concern, and we’re going to tell you how to fix it.

Why Retaining Walls Lean and How to Fix Them

If your retaining wall wasn’t built correctly, it can lean, bow, or sag. This can cause problems with your landscaping or foundation because it won’t protect it as well. If you don’t address it right away, it can quickly turn into a very expensive problem. Luckily, there are a few ways you can go about fixing it, and using a professional company is a great choice to ensure you get a straight and sturdy retaining wall that will last for years.

Solution One – Installing Helical Tiebacks

If you find that your retaining wall is overly stressed, you can install helical tiebacks. These tiebacks provide additional support beyond the area that is currently failing and causing your wall to lean. You’ll have to drill holes through the wall to install these tiebacks. It’s better known as soil nailing.

The tiebacks go into these pre-drilled holes to help stabilize the area behind your retaining wall by connecting to another solid surface. In turn, this removes some of the stress from the wall itself, and this can easily help get your wall straight and keep it from leaning over again. They’re immediately load-tested to ensure that they can take the strain and weight of the earth, and they can last for years after the initial installation.

Solution Two – Wall Anchors

You can reinforce your concrete retaining wall using wall anchors. This is a long-lasting solution that will help to strengthen your retaining wall. Additionally, the anchors will pull the wall back into place and get it as close to the original position as it possibly can. You can use them to shore up leaning or bowed basement walls, but you can also easily incorporate them into your retaining walls. You should have a professional inspection to ensure that this is the correct choice for your situation.

How to Prevent Leaning Retaining Walls

To start, it’s a good idea to consider waterproofing features to ensure that the retaining wall and the surrounding area don’t end up saturated with water. Again, you should have a professional come to inspect your property to ensure you have adequate drainage and water management features in place.

You also want to ensure that you have a solid surface in place to install your retaining wall, and you should make a point to perform routine checks to make sure there isn’t any lean to it. Doing so can help save you a lot of hassle down the road.

Contact Evergreen Landscaping Today

If you noticed a problem with your retaining walls leaning, contact us. Our expert staff are ready to take a look and suggest the best method for getting your retaining wall back in top shape.

09 Jan 2021

Five Winter Landscaping Tips

Five Winter Landscaping Tips

Winter is approaching, and you want to keep your landscaping as neat and healthy as you can all year. To do this, there are several steps you can take in preparation for the cooler weather. Following our top five winter landscaping tips will ensure that you get a landscape that you can be proud of any time of the year.

Tip One – Know Your Hardiness Zone

Although this sounds like something you should automatically do, you’d be surprised at how many people skip knowing their hardiness zone. You want to find out what it is and pick out plants that thrive in that specific zone. Don’t be tempted to keep a zone five plant in your zone seven backyard. Unless you have a microclimate that will allow less hardy plants to thrive, you want to stick to shrubs, trees, and plants especially suited for your zone. This is especially important if you live in a climate with a harsh winter.

Tip Two – Wrap Newly Planted and Young Plants

During the winter, any newly planted and young trees need a little more protection to survive. If you leave thin-barked trees like maple, linden, and ash unprotected, they can end up with sunscald and frost cracking. Additionally, younger trees make the perfect meal for rodents, weakening, or killing the tree. Wrap the tree from the bottom up with burlap or thick paper tree wrap. You can also use a corrugated tube. When the tree begins to show growth signs, remove these protective measures. These protective measures can prevent frost cracking and rodent damage.

Tip Three – Avoid Using Salt-Based De-Icing Products

During the winter, you’ll eventually get ice. However, using a salt-based de-icing product is one easy way to kill your landscaping plants and your grass. Your plants can absorb the salt through the roots or leaves, and this salt absorption will make the tissue dry out by pulling moisture from the plant. Instead, try to use sand instead of salt-based products. If that doesn’t work, you can try a deicer that is potassium or calcium-based and see how it works for you. It may take a little longer, but it’s better for your yard.

Tip Four – Mulch

Many people mulch in the spring months to help your plants retain moisture, but mulch is also essential in the fall and winter months. Mulch can help insulate the ground and protect your plant’s roots from bitterly cold weather or frost. It stops the soil from going through a cycle of repeatedly freezing and thawing, and this is better for the plants. Put down three or four inches of mulch after the first freeze. Don’t get too close to the trunks or stems of your plants.

Tip Five – Water

A lot of gardeners stop watering in the winter, and this can hurt any evergreen plants you have. If you don’t water them enough, the evergreens will quickly deplete their water stores. When this happens, they become more prone to death and winter burn. Water them deeply several times a week before the ground freezes. Once it freezes, you can cut back on your watering.

Contact Evergreen Landscaping

If you’d like to know more about winter landscaping tips, contact us. Our friendly and professional staff are standing by and ready to help in any way they can.

23 Dec 2020

How Can I Fix A Brown Lawn?

How Can I Fix A Brown Lawn

Everyone wants a lush and green lawn. Few things are more frustrating than having dead, brown patches dotting an otherwise flawless landscaping design. Luckily, there are things you can do to get rid of these unsightly brown spots on your lawn, and we’ve picked out several excellent things you can try.

Pay Attention to Your Watering Schedule

If you notice your brown grass gets worse when the temperatures rise, you could have a drought problem. During limited rainfall, grass can go dormant and turn brown to conserve water. Once the weather cools, and the water levels increase, your brown grass should turn green. If you want to push it along, give your lawn an inch or so of water every week. You want to water early in the day to avoid scorching the grass, and remember to use an irrigation system that reaches every area of your space.

Reduce Your Fertilizer Use

Fertilizer has a lot of excess salt that can build up, and this can scorch the grass and cause brown patches. If the brown patches appear a day or two after you apply the fertilizer, you have fertilizer burn. To fix it, water the area thoroughly to flush out the salt and excess fertilizer. Water your lawn an inch a day for the next week to get rid of the fertilizer and protect the lawn’s roots. In the future, pick out slow-release fertilizers and apply them following the instructions on the bag for your lawn type and size.

Balance the pH Levels

When your pH levels in the soil are too acidic, your lawn will develop yellow or brown patches. Get a pH testing kit and check your soil levels. If the pH reads higher than 7.2, you want to apply sulfur to lower it. The more clay-based your soil is, the more sulfur it’ll need to balance the pH. Sandy soil that has a pH reading of 7.5 should only need 10 to 15-pounds of sulfur for every 1,000-square feet. For every 1,000-square feet of loamy soil, you’d need 20 to 25-pounds of sulfur.

Have a Potty Area for Your Pets

Yes, it’s easy to open the door and let your pets go to the bathroom wherever. However, this can cause brown spots on your lawn due to salt in your pet’s urine. You’ll have to cover these areas with ground limestone at a rate of two to five pounds for every 100-square feet. Let it sit for a week to restore your lawn’s pH levels before covering it with topsoil and planting new grass seeds. Set up a mulched potty area for your pets going forward.

Get Rid of Weeds

Did you know that weeds and tree roots will pull a host of vital nutrients from your grass like water and fertilizer? In turn, you get a brown, dry lawn. Spray your lawn with a selective herbicide or dig up problem weeds as you see them. Once you remove them, spray a pre-emergent herbicide over your lawn to stop new weeds from growing again.

Contact Evergreen Landscaping

Do you have brown patches in your lawn that won’t go away? Maybe you need professional help to get a lush and green lawn. If so, contact us. Our friendly and professional staff are ready and willing to help you in any way they can.

08 Dec 2020

How to Winterize Your Garden in the Colder Months

How to Winterize Your Garden in the Colder Months

Your work as a gardener is never done, and this is especially true in the fall months heading into winter. You’ve spent a lot of time, blood, sweat, and tears on your garden to make it what it is, and winterizing is one way to protect your investment. We’ll outline several easy tips you can use to winterize your garden below.

Tip One – Clear Out Weeds and Debris

This isn’t a fun job, but you want to take time and pull the weeds from around your plants. Clean out any dead or drying debris at the same time. These dead and dying debris or weeds are breeding grounds for pests that can survive through the winter and wreak havoc on your plants in the spring. It also gives a place for bacteria and fungi to grow. You can pull the roots out whole because they’re mature, and this reduces the strain on your body as well as your frustration levels.

Tip Two – Plant Any Bulbs

Fall is the time to plant your bulbs so they have the entire winter to rest and get ready to bloom in the spring. You’ll have to dig several inches down into the soil to plant your bulbs, so the winter cold doesn’t kill or injure them. But, it’s well worth it in the spring when you get a strong crop of vegetables or pretty flowers.

Tip Three – Put a Covering on Your Shrubs, Rosebushes, and Trees

If you’re trying to establish new shrubs, rosebushes, or trees, you’ll want to wrap them in a jacket for the winter months to help shield them from the cold and snow. If you don’t want to buy a jacket, you can easily make on out of burlap or landscape fabric that protects the plant’s bark and the delicate branch systems.

Tip Four – Add a Layer of Mulch

Mulch is a great way to retain water and soil moisture during the summer, and it looks nice. However, it also works well in the winter months to help retain a little more heat and lock the cold out. It will deter weed growth in the spring, and it’ll slowly start to break down and add organic matter to the soil to feed your plants when they enter the active growing season again. The mulch should go right up to the plants to protect the roots and stems because these are the most vulnerable parts of the plant.

Tip Five – Dig up Vulnerable Plants

Anyone who grows more tender plants like Elephant Ears, Dahlias, Cannas, or who has more sensitive bulbs should dig them up in the fall. When the warmer weather starts to come back around, you can replant them and enjoy them for another year. If you have Begonias or other annuals, you can move them indoors. Leaving these sensitive plants outside during the colder months is one good way to ensure that you’ll lose them, and it’s almost impossible to bring your plants back from frost damage.

Contact Evergreen Landscaping Today

If you’re not sure how to get your yard or garden ready for the winter, contact us. Our dedicated team is ready and willing to answer any questions you have, address your concerns, or schedule an appointment to come help you winterize your space.

24 Nov 2020

How to Protect Your Plants When You Paint Your House

How to Protect Your Plants When You Paint Your House

You want to put a new coat of paint on your house to brighten it up and boost the curb appeal, but what happens to all of your prized plants? Paint is toxic, and it can cause a lot of damage. That’s not to mention the damage any painting company can accidentally do when they come in with their scaffolding, ladders, and other paint gear. However, there are several things you can do to preserve your plants and get your home ready for a new coat of paint.

  1. Move Your Potted Plants

One of the quickest and easiest things you can do before the paint crew shows up is to move any of your potted plants away or into the house. If you move them away, make sure they’re still in their preferred growing conditions. You can group them together around your yard, or you can bring them indoors in a sunny location and let them be until it’s time to move them back when the project finishes.

  1. Remove Climbing Plants or Ivy

Yes, ivy and other climbing plants look nice attached to your home, but they can actually cause damage to the exterior. Before anyone gets there to paint, you’ll have to remove them. If you’re really attached to them, you could save several cuttings and start them on trellises inside your home or in a nice location in your yard. They’ll eventually grow and start climbing again, and you can put them up against your home to encourage them to climb.

  1. Wrap Bushes and Shrubs

First, trim away any dead, broken, or dying parts of your trees or shrubs by the house to leave healthy growth. Once you do, you can wrap your bushes and shrubs with a protective layer of burlap or landscape fabric. You want to secure this in place with tape, rope, or twine to ensure it anchors in place and doesn’t accidentally slide off with the wind or the crews moving around. When they finish painting and pack up, you can uncover these areas.

  1. Cover Your Flower Beds

Paint spray and splatter is a side effect of taking on a large-scale project like painting the exterior of your home. You want to take time to protect your flower beds or vegetable gardens if it’s not practical to dig them up and move them. If they have fences around them, you can drape landscape fabric over them to provide a barrier. If not, you can lightly put burlap or landscape fabric around and over your flower beds before using stakes or rocks to hold it in place. If you use white fabric, it’ll make it easy to avoid stepping on it.

  1. Trim Greenery

Ideally, you’ll have at least eight-inches between any greenery and your home, but a full foot is often the best way to go. To do this, you will have to trim and prune back any shrubs or plants that are too close to your home. This will help protect them from the paint, and it’ll also give the painters more than enough room to work without stepping on anything.

Contact Evergreen Landscaping

We can help get your yard ready for exterior house painting. We can give you advice or tips on how to protect your precious plants and shrubs. Contact us to set up an appointment today.

10 Nov 2020
7 Must Have Fall Plants

7 Must Have Fall Plants

EGL Must Have Fall Plants

Picking the correct fall plants can give you splashes of color well into the first frost, and we’ve picked out seven gorgeous, must-have plants below.

  • Nandinas – This compact shrub is non-invasive, and they give you a bold orange and red hue that offsets beautifully against the green, lush backdrop.
  • Celosia – You’ll get flame-like plumes that give you vertical height and texture in your garden, and it comes in deep purple, burgundy, warm orange, bright yellow, or scarlet red.
  • Purple Fountain Grass – Add some height to your garden with this festive fountain grass. It gives you purple-burgundy foliage and a lot of texture.
  • Flowering Kale – This hardy plant will survive well into frosty temperatures, and it gives you a dramatic texture and color that pairs will almost any fall flower.
  • Dianthus – Dianthus comes in a wide range of colors, and they have a wonderful scent that makes them pleasant cool-season plants.
  • Chrysanthemum – You’ll find this plant in a broad range of sizes in festive fall shades of yellow, orange, red, white, and peach.
  • Croton – This hardy shrub is an annual that gives you dazzling leaves in rich tones of purple, yellow, orange, and red while also giving you height.


26 Oct 2020

5 Fall Landscaping Mistakes to Avoid

5 Fall Landscaping Mistakes to Avoid

When it comes to keeping your landscaping looking great, timing is everything. For example, fall is a great time to plant trees. However, it’s a very bad time to prune different shrubs. We don’t want you to wait until spring to find out that all of the landscaping you did in the fall hurt your plants more than it helped them. We’ll fill you in on the five biggest fall landscaping mistakes to avoid.

Mistake One – Let the Leaves Pile Up

Raking is one project that can really put a damper on your landscaping in the fall if you don’t keep on top of it. However, it’s not purely for aesthetics. Raking actually helps keep your lawn healthy. If you leave piles of matted leaves on the lawn all winter, these leaves can stop airflow and suffocate your grass. Also, things like fungal infections and snow mold can start under fallen leaves and fester. In turn, this can kill or severely weaken your grass come spring. You’ll end up with dead, brown patches instead of a lush, green lawn.

Mistake Two – Pruning Boxwood, Spring-Flowering Shrubs, and Yew

Boxwood and yews do take pruning very well, but you should hold off on pruning them after the end of August. Pruning them at this stage, stimulates them to grow. This new growth will freeze before it hardens off. While this most likely won’t kill your shrub, it’ll give you a lot of injured areas to prune in the spring. You should prune flowering shrubs like azaleas, forsythia, and lilacs right after they quit flowering for the year. If you wait, they won’t flower for two years.

Mistake Three – Forgetting to Aerate Your Lawn

Any compacted soil needs to be manually loosened up now and again. You can do this through core aeration, and you should do it every fall. If you do it in the spring like a lot of people mistakenly do, you could find a lot of weeds in your yard because weed seeds love to grow in these aeration holes. Aerate in the fall months when the grass is still growing by weeds are at a low point. Aeration allows for more moisture and air to get into the lawn, and this encourages thick growth in the spring.

Mistake Four – You Don’t Protect the Trees

Thin-barked, or young trees you just planted like ash or maple can easily sustain damage over the winter due to bugs or temperature fluctuations. By the time November rolls around, you should protect the trees using tree wrap. Start from the bottom and work your way up. You can remove it in the spring.

Mistake Five – You Don’t Feed Your Lawn

Instead of waiting until the spring to fertilize the lawn, do it in the fall. Applying fertilizer at this time will give your grass time to establish a strong root system over the winter months. In turn, it’ll come back greener and thicker than before.

Contact Evergreen Landscaping

If you want to avoid these five fall landscaping mistakes and get professional help to ensure your landscaping looks top-notch all year, contact Evergreen Landscaping. Our staff is ready to help in any way they can.