Landscaping and Gardening Services in Pismo Beach and SLO County
Mon-Sat: 7:00AM - 5:00PM
17 Mar 2021

What is Hydroseeding?

what is hydroseeding

When you perform seeding applications, you want a method that is going to cover a lot of areas while giving you full and even results. This is where hydroseeding comes in. If you’ve never heard of it, this quick overview will fill you in on everything you need to know.

How Hydroseeding Started

Maurice Mandell of the Connecticut Highway Department gets credit for starting hydroseeding or hydro mulching in the 1940s. His concept involved mixing water and seed before spraying it on areas around the highways and roads in Connecticut to sow grass to prevent erosion and encourage grass growth after construction. Hydroseeding is a very technical process that involves some specialized equipment, and it’s good for any size project but small. In 1953, Charles Finn of Finn Corporation invented the world’s first hydroseeder. They’re currently the biggest hydroseeder manufacturer in the world.

Defining Hydroseeding

Hydroseeding involves spraying a water-based slurry of mulch, seeds, soil additives, and fertilizer to plant seeds. This is one of the most efficient methods of planting for virtually every application but very small areas. The key to the higher efficiency rate of this process is that you combine all of the essential materials for healthy, quick seed germination in a single application. You’ll need:

  • Fertilizer
  • Great seed to soil contact
  • Seed protection
  • Moisture retention

The first thing you have to do determine which additives you need to add to condition your soil for the highest rate of growth and germination for your seeds. You have to get the soil ready for planting by loosening up any highly compacted soil to let the plant roots break in and grow deep. When you get your soil test results back, you can pick out the correct seed blend to create the grass or plants you want to grow.

You’ll usually plant grass during hydroseeding, but it’s typically a mix of plants and grass in the seeds. Pick out the correct fertilizer and additives. These additives could include aluminum sulfate, elemental sulfur, nitrogen, iron sulfate, or lime. If you’re hydroseeding on a hill or slope, add tackifiers. Finally, you should add mulch to give your seeds the best opportunity to have a healthy and quick start with even and sustained growth.

When is the Best Time to Hydroseed?

Your climate will be the biggest factor that impacts when it’s the best time to hydroseed. Ideally, the temperature will fall in the cool but not cold range, and you should have a reasonable amount of rainfall in the forecast. Rain will help offset your watering costs. Generally speaking, fall is the best time to hydroseed because the seeds can establish themselves before going dormant.

Hydroseeding in the early spring months is also acceptable. The cooler temperature and rainy spring weather can create excellent growing conditions. However, if the spring gets directly followed by a hot summer, you’ll spend more watering for the first year to keep the grass alive and growing. Don’t plant it in the summer unless you have a cheap and abundant water source and a lot of time to tend to it.

Evergreen Landscaping Can Help with Hydroseeding

If you’re interested in learning more about hydroseeding or if you want to use it to help create a lush lawn, contact us. Our staff is ready to help in any way they can.

03 Mar 2021

Themed Garden Designs

Does your garden have a theme? Maybe you’ve never tried to create a theme with your garden, and you have no idea where to start. At the core, a themed garden design is landscaping based on a specific idea or concept. There are several more well-known garden themes out there, including:

  • Butterfly gardens
  • Chinese gardens
  • Desert gardens
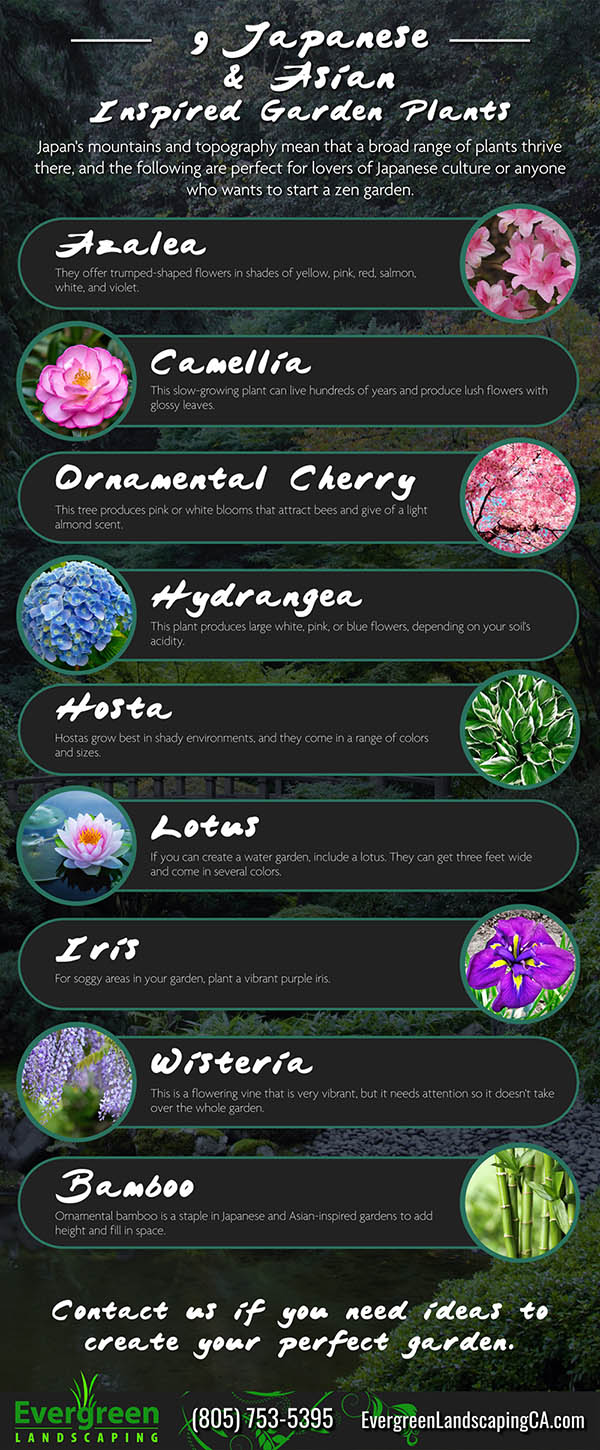
  • Japanese gardens
  • Wildlife gardens
  • Zen gardens

Arguably one of the hardest parts of this process is coming up with the central design idea. Once you pick out an idea that you like, everything else should gradually fall into place. The easiest way to go about this is to think of what you enjoy and let the concept grow from this thought process.

Your garden theme design can vary widely, and you’re spoiled for choice. The only limits to your theme are your imagination. However, this can also be overwhelming, so we’ll give you several theme ideas with examples of flowers you can incorporate into your own yard below.

Wildflower Themed Garden

If you love how wildflowers look, you can easily design a wildflower-friendly garden that you’ll fill with native plants. Depending on your location, bluebells, penstemon, lupine, and coneflower are all excellent picks. Maybe you love wildflowers, but you’re more of a night person. If this is the case, the moonflower, Casa Blanca lily, Queen of the Night, and Gardenia Augusta are all solid choices that bloom during the evening hours.

Color Themed Garden

Do you have a favorite color or colors? You could go for a cool green garden that showcases pops of vibrant yellow or orange blooms, or maybe you want a blue garden. Marigolds, yellow roses, sunflowers, lilies, tulips, and some daisies come in shades of yellow and orange. For a blue garden, try hydrangeas, larkspur, sage, bellflowers, or morning glories. Whatever colors you choose, you can incorporate them into your plant pots or borders too.

Elizabethan Themed Garden

Perhaps you’re someone who is into a more classic design with a calming look and feel. If so, you could incorporate carefully placed benches with deep green hedges framing the garden. Other nice classic touches are water features like fountains, statues, or even a low rock wall.

Consider Your Climate and Home Style

In the early stages of developing your garden theme, consider your local climate because this impacts what will and won’t thrive in your garden. For example, it would be challenging to have a desert garden in Florida, or you would have a challenging time creating a tropical-themed garden in the American Southwest.

Your home’s style will also impact which garden theme you choose. If you live in an older, stately home, incorporating a formal Victorian garden is a great fit. But, having a rock garden with this type of home could look out of place and impact your overall aesthetic.

Contact Evergreen Landscaping

Would you like help bringing your garden theme to life? Maybe you’re not sure which plants will do best in your local climate. Either way, our staff is here to help. You can reach out and get in touch with us to start the design process and get tips and advice.


08 Dec 2020

How to Winterize Your Garden in the Colder Months

How to Winterize Your Garden in the Colder Months

Your work as a gardener is never done, and this is especially true in the fall months heading into winter. You’ve spent a lot of time, blood, sweat, and tears on your garden to make it what it is, and winterizing is one way to protect your investment. We’ll outline several easy tips you can use to winterize your garden below.

Tip One – Clear Out Weeds and Debris

This isn’t a fun job, but you want to take time and pull the weeds from around your plants. Clean out any dead or drying debris at the same time. These dead and dying debris or weeds are breeding grounds for pests that can survive through the winter and wreak havoc on your plants in the spring. It also gives a place for bacteria and fungi to grow. You can pull the roots out whole because they’re mature, and this reduces the strain on your body as well as your frustration levels.

Tip Two – Plant Any Bulbs

Fall is the time to plant your bulbs so they have the entire winter to rest and get ready to bloom in the spring. You’ll have to dig several inches down into the soil to plant your bulbs, so the winter cold doesn’t kill or injure them. But, it’s well worth it in the spring when you get a strong crop of vegetables or pretty flowers.

Tip Three – Put a Covering on Your Shrubs, Rosebushes, and Trees

If you’re trying to establish new shrubs, rosebushes, or trees, you’ll want to wrap them in a jacket for the winter months to help shield them from the cold and snow. If you don’t want to buy a jacket, you can easily make on out of burlap or landscape fabric that protects the plant’s bark and the delicate branch systems.

Tip Four – Add a Layer of Mulch

Mulch is a great way to retain water and soil moisture during the summer, and it looks nice. However, it also works well in the winter months to help retain a little more heat and lock the cold out. It will deter weed growth in the spring, and it’ll slowly start to break down and add organic matter to the soil to feed your plants when they enter the active growing season again. The mulch should go right up to the plants to protect the roots and stems because these are the most vulnerable parts of the plant.

Tip Five – Dig up Vulnerable Plants

Anyone who grows more tender plants like Elephant Ears, Dahlias, Cannas, or who has more sensitive bulbs should dig them up in the fall. When the warmer weather starts to come back around, you can replant them and enjoy them for another year. If you have Begonias or other annuals, you can move them indoors. Leaving these sensitive plants outside during the colder months is one good way to ensure that you’ll lose them, and it’s almost impossible to bring your plants back from frost damage.

Contact Evergreen Landscaping Today

If you’re not sure how to get your yard or garden ready for the winter, contact us. Our dedicated team is ready and willing to answer any questions you have, address your concerns, or schedule an appointment to come help you winterize your space.

24 Mar 2020
How to get Rid of Aphids From Your Vegetable Garden

How to get Rid of Aphids From Your Vegetable Garden

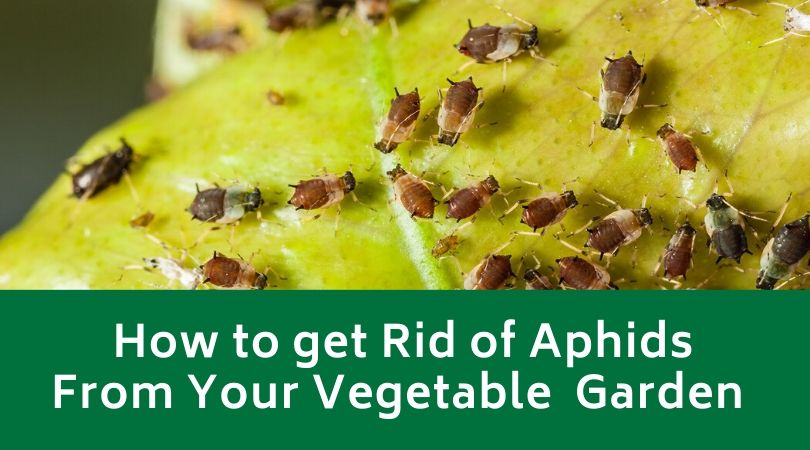
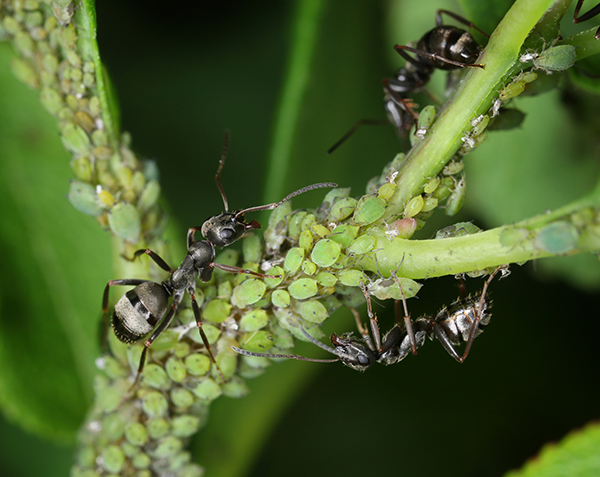
Aphids are one pest that seam to show up in every garden at one point or another. Aphids are soft-bodied, small insects that survive in almost any climate zone. They also multiply quickly, and this is why it’s so important to get rid of them and get the infestation under control before they start reproducing.

Several generations of aphids can occur in a single season, and they can wreak havoc on your garden. The good news is that they’re a slower insect, and this slow speed makes controlling them relatively easy. 

aphids

Six Ways to Get Rid of Aphids

Once you notice aphids in your garden, you have several ways to get rid of them. Start with one and see the results. If they’re still there, retreat the garden or move on to the next method.

Cold Water
Take your hose and give the plant’s leaves a good blast of cold water. Since aphids are slow, this is usually enough to dislodge them from your plants. They usually can’t find their way back to the same plant. Spray the cold water in the early morning hours and check your garden in the afternoon. Repeat as necessary.

Flour
If your aphid invasion is already out of control, dust all of your plants with a light coating of flour. If the aphids eat the flour, it can cause constipation. Make sure all sides of each leave have a coating on them and reapply it if the leaves get wet and the flour washes away.

Dish Soap and Water
One cost-effective way to get rid of aphids is to spray or wipe the plant’s leaves with a mixture of water and dish soap. You can use two cups of water with a few drops of dish soap to create a mild solution. Once you start applying it, reapply it every two or three days for two weeks.

Cayenne Pepper
There is a variation to the dish soap and water method where you add one quart of water with one teaspoon of dish soap and a pinch of cayenne pepper. Shake this mixture well and spray it on the leaves of your plants once every two or three days for two weeks. It should scare the aphids off.

Diatomaceous Earth (DE)
Diatomaceous Earth is a non-toxic organic material that works to kill the aphids in your garden on contact. However, you want to make sure you don’t apply it when your plants are blooming, and DE is harmful to any pollinators that come into contact with it.

Neem Oil
Neem is an essential oil that has powerful insecticide properties, but it’s not strong enough to kill the plants themselves. Dilute a few drops of the essential oil in a spray bottle with two or three cups of water. Spray this mixture on your plants every few days until you don’t see any aphids. 

Contact Evergreen Landscaping

Do you need help with aphids in your garden? Maybe you’d like to set up your first garden, and you’re not sure which plants to choose, how to keep it healthy, or where to put it. If so, contact our talented team today.

17 Feb 2020

What Should You Know About Yard Fertilization And Maintenance?

What Should You Know About Yard Fertilization And Maintenance

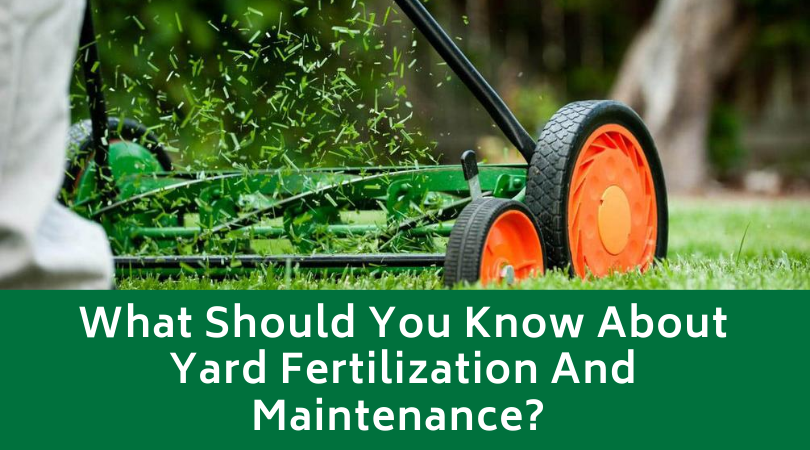
Spring is the season which poets adore. After a cold winter, warmer winds come, and the sun starts to shine. The plant world wakes up from a deep slumber, and new beautiful flowers begin to blossom. Gardening is proof that patience can take you a long way. You need to feed, nurture and water a seed until it cracks, starts growing, and then finally blossoms into a masterpiece.  

No matter if you have a few pots on the balcony or entire acres of land, taking care of a yard will make a family bond better, and it has a lot of benefits. You can get fresh vegetables, aromatic herbs, and some of them sprout almost instantaneously. Click on this link to read more. 

What are the benefits of maintaining a garden? 
yard maintenance 2

First of all, the main benefit is that you get out in the sun and you get moving. Our entire culture has shifted in the past hundred years. Most of our lives are in front of the computer. Our eyes are thankful when we look away from the blue screens and into something green and full of chlorophyll.  

Yard work is considered as an activity which is moderately intense. Thirty minutes of movement every day is critical when it comes to having a healthy heart. Since you squat a lot during this time, you also get a gentle stretch in the pelvic region, which improves digestion and posture.  

If you have small kids, then this will be a great time to teach them how beautiful the outside world is. Most kids today are stuck inside playing video games, and they don’t want to go outside. Gardening is a great way to show them the magnificence of exploring the outside world.  

When should you fertilize your lawn? 
yard maintenance 3

We can’t survive without food. The same thing applies to plants. If they don’t get enough nutrients, they will wither and die. That’s why you need to use fertilizer. It’s a key component in maintaining the look and the health of your lawn or garden. But, when you look around most neighborhoods, no one seems to be doing it.  

Most people don’t know how to fertilize when to do it, or which products to use. Another thing that complicates the process is that if you have no idea what you’re doing, you can put too much or too little, and that can be harmful to the flora. Luckily, there are a few rules that you can follow to make sure your garden is always on point. 

Most people wonder which is the correct day to start. No one knows the exact day, but most people can tell from the weather and the temperature outside that mid-April is a perfect time. If you want to be a bit more scientific, you could get a thermometer and measure the soil.  

As soon as it crosses over 55 degrees Fahrenheit, you can start fertilizing. If you don’t live in America, then the temperature is 12.8 degrees Celsius. If you don’t want to go in that much detail, just check if there are any lilacs blossoming. Either that, or when the grass starts to grow.  

What do the numbers mean? 

When you go to the store, there will be many different labels on the bags. Most of the time, there are three letters and three numbers. The first letter is N, which means nitrogen. The second one is P, which means phosphate. And the final one is K, which means potassium. These three ingredients have everything your garden will need during the entire season.  

The numbers mean percentages. So, for example, if you get a bag that says 20 – 10 – 10, that means there’s twenty percent nitrogen, ten percent phosphate, and ten percent potassium. The rest of the ingredients are fillers that make sure all the material is evenly distributed. The best bag to use in the spring is a 20-5-10.  

Fast Release or Slow Release? 
yard maintenance 4

When you think of the perfect breakfast in the morning, it usually involves a piece of toast, a few eggs, and bacon, with a cold glass of orange juice. These foods have all the necessities that can keep us going throughout the day. Not only that, but it takes a long while to digest them. That gives us energy for a more extended period of time. Well, the same logic applies to plants.  

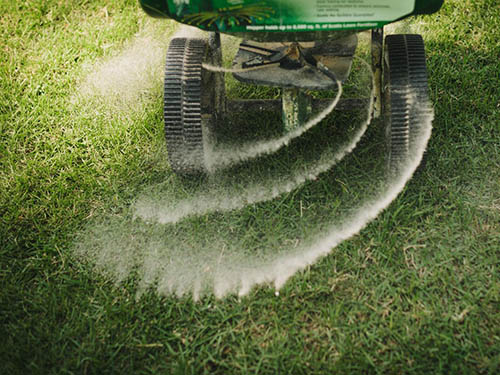
Slow-release fertilizers work great because of the same reasons. Not only that, but you can also wait longer before you need to apply it again. Instead of doing it every four weeks, you can do it every six to eight weeks. The correct time depends on when you water the lawn. Additionally, you need to pay extra attention to the nitrogen.  

This is the compound that makes your grass grow, and it is also responsible for giving it that bright green color. The optimal amount should be one-tenth of a pound per week. More is not always better. If you put more, the grass will not get any greener. It will only start growing faster.  

This means you’re going to have to mow it more often. Or, if someone else is doing it for you, you’re essentially giving away free money. The best thing you can do is make it look like a glowing emerald without the grass growing super-fast.  

Should you mimic the pros, or use granules? 

If you’re a casual homeowner, the best solution is to use granules. They are amazingly simple to use with the help of a spreader. That takes a bit more time than a professional such as Omaha NE Lawn services who have been doing it for a long time. However, pros have a tanker truck with them, and they are doing it multiple times a day.  

Unlike regular hobbyists, they take wind speeds into consideration to make sure everything is sprayed in such a short time. If you try to use a sprayer, it will be more challenging to get it evenly across the entire yard. This will make some of the herbs on one side taller than the other. That means you’re going to have to micromanage the growth every weekend. Instead, opt for granules that are much easier to apply accurately.  

How should you plan the applications? 

We mentioned above that the first application needs to happen somewhere around mid-April. You get the exact day if you use a soil thermometer or if you see any lilacs blossom. But after waking up from the winter, the soil is malnourished and needs feeding.  

Schedule the next fertilization to be around four weeks after the first application. That means that the next time you bring out the bag should be in mid-May. After these two, you can wait a month and a half, up to two months. However, manure is best to use the third and fourth time. That’s an organic compound, and it will be much better.  

It will be smelly for a few days, but that’s how nature works. Finally, you should remember the feeding time in the fall. Even if the grass begins to wither, the roots are still there. The best option for this time should be a fall fertilizer, which is high in potassium and phosphorous. This will make sure the roots are healthy, and they will survive the winters with no problems.  

When should you water the lawn? 

There are two ways you can approach this. The first way is to get an automatic sprinkler and set it up on a timer to spray two times a day. The second option is a bit more fun. You take a hose and a pair of flip flops, and you go outside. If you have kids, a Sunday morning might be a great time to have a water balloon fight.  

Since it’s a lawn, its primary use is for you to enjoy it and have fun on it. On the other hand, looking at a meticulously shaped yard is something that also brings a lot of joy to people. In both cases, you should note that the more you water the soil, the more fertilizer it will need. If you have an automated system, then the optimal time between feeding should be around six weeks.  

If you take a hose and spray it every other day, then you can add two more weeks to that period. Finally, remember to read the labels on the bag you’re using. For example, granules need water so they can break up and be absorbed. Some other types need to be sprayed on wet ground.  

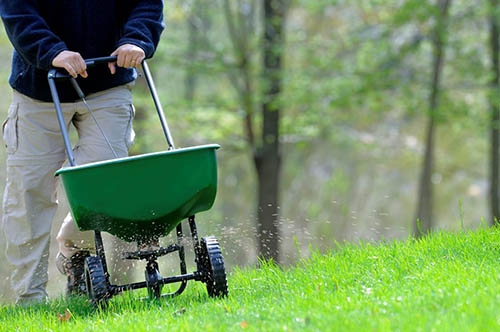
How to use a spreader? 

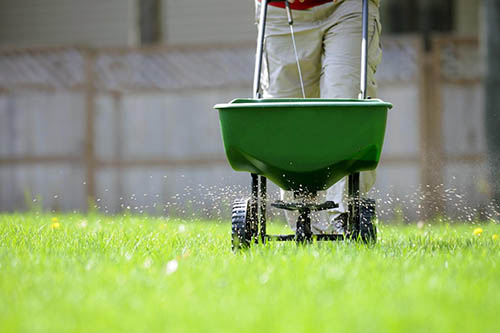
Before you do anything else, make sure that the hopper is shut before you start filling the device. So many people forget about this small detail, and then they find themselves in a pile of granules. That should be known as lesson number one since everybody does it at least once. You won’t know the value of a closed hopper before you need to clean up every single granule.  

Now, as long as that’s done, you can park it in your patio or driveway, it doesn’t matter. If you don’t want to use a broom at all, you can put a tarp under it. The same method is used if you start off on the grass because too many granules in one spot could kill the plants. Follow this link for more info https://www.popularmechanics.com/home/lawn-garden/how-to/g237/the-quick-and-easy-guide-to-fertilizing-your-lawn/ 

Also, when you’re buying the equipment, make sure you get a broadcast type. It costs around thirty bucks, and you only have to buy it once, and you can use it for years. The way this type of spreader works is it throws the granules much further away, and there won’t be any stripes anywhere.  

Of course, while you’re doing this activity, you need to walk with the same speed. If you walk fast, then slow, you won’t get the desired effect. A slow, steady pace that evenly distributes the fertilizer is optimal. Anything else will cause thin and thick spots, and no one wants that. When you read the product description, it always says to use a bit more of it.  

That’s not a rule you should follow. Always start with less. And many professionals recommend that fertilizing a bit less is much better than a bit more. The reason they say this is because too many phosphates could burn the flora.  

That’s a waste of money, and you don’t want any naked spots as soon as spring begins to fade away. Finally, when you finish the job, take a broom, and collect the remaining granules. No matter how careful you try to be, there will always be some things that will miss the goal. There’s bound to be a few on the street, driveway, and patio.  

Many people think that the rain will wash that away. It’s true that the rain will wash them away, but that’s how many chemicals get in the rivers. And we all drink water from the rivers. It’s safer for the environment to spend a few minutes and clear up the mess we’ve made. 

When you finish doing that, you can put the remainders in the same bag. Then close it up, put it somewhere in a shed or a garage where it’s cold and dry.  

What are some projects for a family garden? 

If you have kids, a great way to teach them about chores and how to take care of things is to start a garden project. For this, you might ask some neighbors in the area what kinds of plants grow best on the soil you have in the neighborhood.  

From here on out, you can go and purchase some seeds or seedlings of vegetables that your children love. It’s definitely worth to try and grow some veggies and make a salad out of them. The taste is a thousand times better than buying them in a store.  

You can also taste all of the hard work you’ve done together. Peas, cucumbers, and tomatoes are some of the top picks that grow quite fast. If you want something that’s a bit prettier, you could always choose some delicate and beautiful flowers.  
06 Feb 2020
How to Create a Roof Garden on My House

How to Create a Roof Garden on Top of My House

Rooftop gardens are a beautiful addition to any urban home or business. You can add herbs, flowers, shrubs, and edible plants. However, this will take some time and a few practical steps. This is what we’ll outline for you below.

1. Prep Your Roof
You want to find out how much weight your roof can safely hold. This is the loading capacity. A structural engineer can give you an exact weight. You’ll have to use this weight to make sure all of your plants, furniture, equipment, plant containers, dirt, and weather conditions don’t overload your roof.

2. Check Building Codes
Go to your local city hall and check with your building codes. You may end up with regulations that govern how tall or large your garden can be. They may even stop you from building one. See if you need any permits and special features while you’re there.


How to Create a Roof Garden on My House

3. Monitor the Sun Exposure
Monitor how much sun your roof gets over one or two weeks. This will give you a good idea of what you can and can’t have. Monitor it in the morning, midday, and evening hours. Make a note of any heavily shaded areas.

4. Map Out Your Garden Design
Take a sheet of graph paper and map out your garden’s design. Plot out where your plants will go, your furniture, and any features you want to have. You can measure your roof beforehand and scale your sketch to match your space.

5. Connect a Hose
Connect a hose that will go to your roof. If there is a water line or faucet on your roof, connect your hose there. This will make watering your new rooftop garden an easy process. You can also rig up water containment systems if there is no hose attachment.

6. Get Your Gardening Supplies
Go shopping and pick out your containers. You can get metal, wood, terracotta, ceramic, and more. You may want to pick out a trellis too for any climbing plants. Choose plants that are heat and drought-resistant. Native plants, ornamental shrubs, and ornamental trees are good choices. Avoid plants with big leaves because they tend to burn. Pick out your potting soil too.

7. Set Up Your Garden
Once your plants are in their containers, it’s time to set up your garden. Lay your plants out on the rooftop as you had on your design. You can pick a focal point and arrange your garden around it, or you can use all of the space to flow from one area to the next.

8. Add Decorations
When you get your garden set up, it’s time to add all of the small decorations that make it unique. You could have lightweight furniture, a birdhouse, an umbrella for shade, and a small table. Choose pieces that have a multi-functional design to make the most out of your space.

9. Maintenance
Be prepared to perform routine maintenance on your garden. You’ll want to water it in the cooler hours of the day like early morning or late afternoon. Trim back plants as they get too long, fertilize, and re-pot them as necessary. 

Contact Evergreen Landscaping

Are you ready to set up your new rooftop garden? If so, contact us. We can help you decide the perfect plants, how to set up your garden, and how to keep it healthy.