Landscaping and Gardening Services in Pismo Beach and SLO County
Mon-Sat: 7:00AM - 5:00PM
07 Jun 2023

Landscaping with Succulents: Perfect Choices for Coastal California

Landscaping with Succulents

Whether you’re an experienced landscaper or a green-thumbed beginner, there’s something undeniably captivating about the world of succulents. They’re as hardy as they are charming, and their impressive adaptability to arid conditions makes them the perfect addition to any Coastal California garden. So, let’s take a dive into landscaping with succulents, where you’ll find a wealth of possibilities as diverse as the plants themselves.

Succulents owe their drought-resistant capabilities to their thickened, water-retaining leaves and stems. In a region where the weather flip-flops between sunshine aplenty and scarce rainfall, these little survivors have adapted to flourish. But that’s not all; succulents also bring a distinct aesthetic appeal to your landscape. From a striking agave standing solo to a patchwork quilt of colorful echeverias, there’s a succulent to suit every garden design.

The Succulent Spectrum

Succulents come in an astonishing range of shapes, sizes, and colors, which means there’s always a perfect candidate for that empty garden corner you’ve been meaning to spruce up.

Agave – Agaves are a striking choice for a focal point. With rosettes that can grow several feet wide and a variety of hues from cool blue-greens to warmer variegated types, these plants command attention. Remember, they love full sun, so let them bask!

Echeveria – This group of rosette-forming succulents offers an array of colors. From the ghostly white ‘Lola’ to the nearly neon ‘Perle von Nurnberg’, echeverias are excellent for adding pops of color to your landscape.

Sedum – These are low-growing, spreading succulents perfect for ground cover or trailing down walls or containers. ‘Angelina’ lights up with golden-yellow foliage, while ‘Dragon’s Blood’ sedum offers a deep red.

Aloe – Aloes are a group of succulents known for their medicinal properties and spiky leaves. Aloe vera is a common type, but consider species like Aloe cameronii with its red-tinged leaves, or the tall Aloe ‘Hercules’ for an impressive vertical element.

Designing with Succulents

Succulents are wonderfully versatile. With a little creativity, they can suit almost any landscape style.

Container Gardening – Succulents make excellent container plants. A mix of echeverias in different colors can create a stunning living arrangement that changes over time as the plants grow. Or try planting a tall agave in a standalone pot for a dramatic statement.

Rock Gardens – With their low water needs and love for well-drained soil, succulents are natural fits for rock gardens. Use a variety of sedums as a colorful, textured ground cover around larger stones, or tuck an aloe or two into a rocky crevice for an intriguing contrast.

Xeriscaping – For those looking to conserve water, succulents are a natural choice. Xeriscaping, a style of landscaping designed to require minimal irrigation, often heavily features succulents. Replace your lawn with a carpet of colorful, low-growing succulents, or create a dry riverbed interspersed with taller, statement-making agaves or aloes.

Living Walls – If you’re short on ground space, why not go vertical? Living walls crafted from succulents offer a unique, eye-catching way to incorporate greenery. Imagine a canvas of mixed echeverias creating a live painting on your garden wall.

Benefits of Landscaping with Succulents

Beyond their aesthetic versatility, succulents come with a wealth of benefits. They’re low maintenance, requiring infrequent watering and little to no pruning. They can also thrive in a variety of soils, provided it’s well-draining. And let’s not forget the water conservation aspect; in drought-prone areas like Coastal California, landscaping with succulents is a beautiful way to be eco-friendly.

Moreover, they’re excellent for improving your home’s curb appeal. Whether you’re planning to sell or just want to be the envy of your neighbors, a well-cared-for succulent landscape can significantly enhance your property’s aesthetic value.

Watering and Soil Requirements

One of the most common pitfalls in succulent care is overwatering. Succulents store water in their leaves, stems, and roots, which allows them to endure periods of drought. When it comes to watering, less is often more. Let the soil dry out completely between waterings, and when you do water, water thoroughly until you see it coming out of the drainage holes at the bottom of the container. During hotter months, you might need to water more frequently, but always ensure the soil is dry to the touch before you do so.

The type of soil your succulents are in is just as important as your watering schedule. Well-draining soil is key, and many garden centers sell soil mixes specifically designed for succulents and cacti. These mixes often contain coarse sand, perlite, or other materials that help increase drainage. If you’re making your own mix, consider adding these elements to your regular potting soil. Remember, succulents are more likely to suffer from too much water than too little.

Sunlight and Temperature

Succulents love sun, but they can be a bit picky about it. Most succulents prefer 6-8 hours of sunlight per day, making them perfect for that sunny window sill or bright spot in your garden. However, some varieties can get sunburned if exposed to direct, harsh sunlight during the hottest part of the day.

When it comes to temperature, succulents are typically tolerant of a wide range, but they’re not big fans of freezing weather. In Coastal California, this is less of a concern, but if a rare cold snap is in the forecast, consider moving your outdoor potted succulents indoors or cover your in-ground plants with frost cloth.

With these care tips in mind, you’ll be well-equipped to maintain a thriving, beautiful succulent landscape that will add character to your Coastal California garden all year round.

There’s a world of potential in these resilient, charming plants. Embrace the world of succulents in your Coastal California garden, and you’ll have a landscape that’s as sustainable as it is beautiful. Happy gardening!

17 May 2023

Top 10 Tips For Making Your Lawn Greener This Year

Top 10 Tips For Making Your Lawn Greener This Year

Maintaining a green and lush lawn in Southern California can be a challenge, especially with the region’s hot and dry climate. However, with the right knowledge and tools, it’s possible to achieve a healthy and vibrant lawn that you can enjoy all year round. In this blog post, we’ll share our top 10 tips for making your lawn greener this year in Southern California.

Choose the right type of grass

The type of grass you choose for your lawn can make a big difference in its overall health and appearance. In Southern California, warm-season grasses such as Bermuda, Zoysia, and St. Augustine are popular choices due to their ability to tolerate high temperatures and drought conditions. However, it’s important to do your research and choose a variety that is best suited for your specific location and soil type.

Water efficiently

Watering your lawn efficiently is key to maintaining its health and green color. In Southern California, it’s recommended to water your lawn deeply and infrequently, typically 1-2 times per week depending on the weather conditions. This allows the water to penetrate the soil and reach the roots, promoting healthy growth. Additionally, consider using a smart irrigation system that adjusts watering schedules based on the weather and soil moisture levels.

Mow at the right height

Mowing your lawn too short can damage the grass and cause it to turn brown. It’s recommended to mow warm-season grasses at a height of 1-2 inches, depending on the variety. This allows the grass to maintain a healthy root system and better withstand drought conditions.

Fertilize regularly

Fertilizing your lawn with the right nutrients is essential for maintaining its health and green color. In Southern California, it’s recommended to fertilize warm-season grasses in the spring and summer months, typically every 6-8 weeks. Consider using a slow-release fertilizer that gradually releases nutrients over time for optimal results.

Aerate the soil

Aerating the soil involves creating small holes in the lawn to allow air, water, and nutrients to penetrate the roots. This can help improve the overall health and appearance of your lawn. In Southern California, it’s recommended to aerate warm-season grasses in the spring or fall, when the grass is actively growing.

Control weeds

Weeds can quickly take over your lawn and rob it of essential nutrients and water. To control weeds, consider using an herbicide specifically designed for your grass type. It’s important to follow the instructions carefully and avoid overusing herbicides, as they can damage the grass and soil.

Address pest problems

Pests such as grubs, chinch bugs, and sod webworms can wreak havoc on your lawn and cause it to turn brown. To address pest problems, consider using an insecticide specifically designed for your grass type. It’s important to follow the instructions carefully and avoid overusing insecticides, as they can harm beneficial insects and pollinators.

Manage thatch buildup

Thatch buildup occurs when dead grass and other organic matter accumulates on the surface of the soil. This can prevent water, air, and nutrients from reaching the roots and cause the grass to turn brown. To manage thatch buildup, consider using a dethatching rake or power rake to remove the excess debris. It’s recommended to dethatch warm-season grasses in the spring or fall, when the grass is actively growing.

Provide shade

In Southern California, the intense sun and heat can cause grass to turn brown and wilt. To provide shade for your lawn, consider planting trees or installing shade sails or umbrellas. This can not only help keep your lawn green, but also provide a cool and comfortable outdoor space for you and your family to enjoy.

Address soil issues

Soil issues such as pH imbalance and nutrient deficiencies can have a big impact on the health and appearance of your lawn. It’s important to address these issues by regularly testing your soil and applying the necessary amendments. In Southern California, it’s common for soil to be alkaline, which can lead to nutrient deficiencies. Consider adding sulfur or other acidifying agents to balance the pH and improve nutrient uptake.

Maintaining a green and healthy lawn in Southern California requires a combination of proper watering, fertilization, pest control, and soil management. By following these top 10 tips, you can achieve a vibrant and lush lawn that you can enjoy all year round. Remember to choose the right type of grass, water efficiently, mow at the right height, fertilize regularly, aerate the soil, control weeds and pests, manage thatch buildup, provide shade, and address soil issues. With a little effort and attention, your lawn can be the envy of the neighborhood!

03 May 2023

The Best Way To Repair Patches On Your Lawn

The Best Way To Repair Patches On Your Lawn

Maintaining a healthy and green lawn in Southern California can be challenging due to the region’s hot and dry climate. Patches of dead or discolored grass can be a common problem for homeowners, but there are several effective ways to repair these patches and restore the appearance of your lawn.

Identifying the cause of patches

Before you can repair patches on your lawn, it’s important to identify the underlying cause of the problem. Common causes of patches include compacted soil, poor drainage, overwatering, underwatering, fungal diseases, and pest infestations.

If you’re unsure of the cause, you can consult a professional landscaper or extension agent for guidance. Once you’ve identified the cause, you can take steps to address the issue and prevent future patches from occurring.

The best way to repair patches on your lawn

There are several effective methods for repairing patches on your lawn in Southern California, depending on the severity of the issue and your personal preferences. Here are some of the best ways to repair patches on your lawn:

Rake and seed: If the patches on your lawn are small and not too severe, raking the affected area and sowing grass seed can be an effective method of repair. To do this, rake the affected area to remove any dead grass, weeds, and debris. Then, sow grass seed over the area and water it thoroughly. It’s important to keep the soil moist until the new grass has become established.

Sodding: If the patches on your lawn are larger or more severe, sodding can be an effective way to repair them. To sod a patch, remove the dead grass and soil from the affected area and level it. Then, lay down a layer of fresh soil and lay the sod over it. Water the area thoroughly and keep it moist until the sod has become established.

Reseeding and fertilizing: If your entire lawn is thin and patchy, reseeding and fertilizing can be an effective method of repair. To do this, rake the entire lawn to remove any dead grass, weeds, and debris. Then, sow grass seed over the entire area and apply a high-quality fertilizer. Water the lawn thoroughly and keep it moist until the new grass has become established.

Topdressing: If your lawn has a thin layer of soil, topdressing can be an effective way to repair patches and improve the overall health of your lawn. To topdress your lawn, apply a layer of compost or topsoil over the entire area and rake it in. This will provide your lawn with additional nutrients and improve soil quality.

Alternative: Artificial turf

If you’re looking for an alternative to repairing patches on your lawn, artificial turf can be a great option. Artificial turf is a low-maintenance and long-lasting alternative to natural grass. It looks and feels like real grass, but requires no mowing, watering, or fertilizing. Additionally, artificial turf is more durable than natural grass and can withstand heavy foot traffic, making it a great option for families and pets.

Installing artificial turf involves removing the existing grass and soil, installing a layer of crushed stone, and laying the artificial turf over it. The turf is secured in place with stakes and filled with a layer of sand or rubber crumb infill.

Artificial turf can be a great option for homeowners who want a low-maintenance and long-lasting lawn that looks and feels like real grass. Additionally, artificial turf can save water and reduce your water bill, making it an environmentally friendly option.

It’s important to note that artificial turf does require an initial investment and installation cost, but it can save you money in the long run by eliminating the need for watering, mowing, and fertilizing. Additionally, artificial turf is a great option for homeowners who live in areas with drought conditions or water restrictions, as it doesn’t require any water to maintain its appearance.

Another benefit of artificial turf is that it is more resistant to pests and disease than natural grass. This means that you can avoid the use of harmful pesticides and chemicals that can harm beneficial insects and pollinators.

In addition to being low-maintenance and durable, artificial turf is also very versatile. It can be used for a variety of applications, including sports fields, playgrounds, and landscaping. Artificial turf can be customized to fit any shape or size, and can be designed to look like natural grass or any other surface.

Repairing patches on your lawn in Southern California requires identifying the underlying cause, choosing the right repair method, and taking steps to prevent future patches from occurring. Whether you choose to repair patches naturally or install artificial turf, it’s important to take care of your lawn to keep it healthy and looking green. With the right knowledge and care, you can have a beautiful and healthy lawn that you can enjoy for years to come.

19 Apr 2023

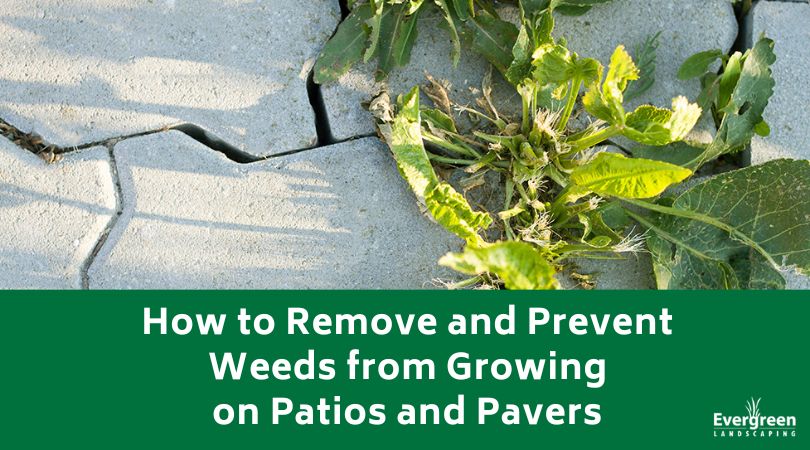
How to Remove and Prevent Weeds from Growing on Patios and Pavers

How to Remove and Prevent Weeds from Growing on Patios and Pavers

Patios and pavers are a beautiful addition to any outdoor space, but they can quickly become overrun with weeds. Weeds can be unsightly and even cause damage to your patio or pavers. Here are some simple and effective ways to remove and prevent weeds from growing on your patio or pavers.

How to Remove Weeds from Patios and Pavers

  • Use boiling water: Boiling water is a simple and effective way to kill weeds. Pour the boiling water directly onto the weeds, making sure to cover the entire plant. This will kill the weed and prevent it from regrowing.
  • Use cornmeal: Sprinkling cornmeal on your patio or between your pavers can help prevent weeds from growing. Cornmeal contains a natural fungus that kills weed seeds. Simply sprinkle the cornmeal over the areas where you want to prevent weeds from growing.
  • Use baking soda: Baking soda can be used to dry out and kill weeds. Sprinkle baking soda directly onto the weeds, or mix it with water to create a solution that can be sprayed on the weeds. This will dry out the weeds and kill them.
  • Use a mixture of salt and water: Mix salt and water in a spray bottle and spray directly onto the weeds. The salt will dehydrate the weeds and kill them. Be careful when using this method, as salt can be harmful to surrounding plants.
  • Use a natural weed killer: You can make your own natural weed killer by mixing vinegar, salt, and dish soap. This solution can be sprayed directly onto the weeds and will kill them. However, be careful when using this solution on your patio or pavers as it can stain or discolor some materials.

How to Prevent Weeds

  • Regularly sweep or blow your patio: One of the simplest ways to prevent weeds from growing is to remove any dirt, debris, and fallen leaves from your patio. This will prevent weed seeds from taking root and growing.
  • Apply a weed preventer: Apply a weed preventer to your patio and between your pavers. Look for a product that is specifically designed for use on patios and pavers, and follow the instructions carefully. This will prevent weeds from growing for a certain period of time.
  • Use landscape fabric: If you’re installing a new patio or pavers, lay down landscaping fabric before laying the stones. This will prevent weeds from growing up through the cracks. Be sure to overlap the edges of the fabric by at least 6 inches.
  • Use polymeric sand: Use polymeric sand when filling in the gaps between pavers. This type of sand has a polymer added to it that hardens when it gets wet, creating a solid barrier that prevents weeds from growing in between pavers. Be sure to sweep the sand into the gaps and then wet it down to activate the polymer.
  • Seal your patio or pavers: Sealing your patio or pavers can help prevent weed growth by creating a barrier between the soil and the surface of your patio. Choose a sealer that is specifically designed for use on your patio or pavers and follow the instructions carefully.
  • Use natural remedies: Sprinkle baking soda, salt, or cornmeal in between the pavers and on your patio to prevent weeds from growing. This will help prevent weed seeds from taking root and growing.

When it comes to preventing weeds from growing on your patio or pavers in Southern California, timing is key. Applying weed preventers at the right time can ensure that they are most effective in preventing weed growth. Here are some tips on when to apply weed preventers in Southern California:

  1. Apply in the dry season: In Southern California, the dry season typically lasts from May to October. This is the ideal time to apply weed preventers, as there is less rainfall and moisture to activate weed seeds. Applying weed preventers during this time can help prevent weed seeds from germinating and taking root.
  2. Apply before laying pavers: If you’re planning on installing a new patio or pavers, consider applying weed preventers before laying them down. This will prevent weed seeds from taking root in the gaps between the stones.
  3. Apply after weeding: If you’ve recently removed weeds from your outdoor space, it’s a good idea to apply a weed preventer to prevent new weeds from growing. Make sure to apply the weed preventer after removing the weeds to ensure that it is most effective.
  4. Pay attention to instructions: If you’re using a commercial product, be sure to check how frequently you should reapply.

Removing and preventing weeds on your patio or pavers can be a simple and straightforward task when you use the right methods. By using these tips, you can keep your outdoor space weed-free and looking great all year round. Of course, if you’re tired of handling weeds by yourself, you can give us a call and set up routine landscape maintenance!

08 Feb 2023

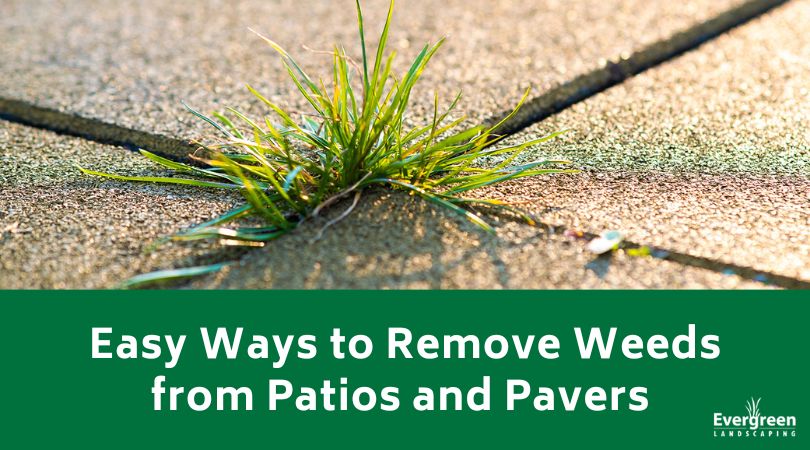
Easy Ways to Remove Weeds from Patios and Pavers

Easy Ways to Remove Weeds from Patios and Pavers

You want your pavers to look nice, but weeds can make this a challenge when they start popping up in the cracks. To make matters worse, different weeds have varying root systems, so getting rid of them for good can be difficult. We want your walkways or paths to look nice, so we’re going to highlight several easy ways to remove weeds from your pavers or patio below.

1. Boiling Water

Pouring boiling water on the weeds is a quick and easy way to remove them from the cracks. This trick works nicely for stubborn perennial weeds like dandelions. Start by pulling or cutting the leafy tops off, and then carefully pour the boiling water into the cracks. Some perennial weeds can come back, but they should die off after two or three treatments.

2. Vinegar

Vinegar can be a good option to remove young perennial or annual weeds, but it won’t work well to kill off established perennial weeds. Also, vinegar will alter the soil’s nutrient composition and make it harder for things to grow, so you must be careful when applying it. Remove the upper leafy portion of the plant first and pour the vinegar directly into the cracks. You want to use white vinegar instead of red because red vinegar can stain the pavers.

3. Good Pointing

If the soil between the pavers is loose, it is easier for the weeds to push through it. First, remove the weeds with any tool you like to give yourself a clean working space. Dig out the soil or hit it with a quick blast of water from the pressure washer. Next, pour polymeric sand into the cracks, ensuring you brush off as much from the paver or patio surface as possible. To finish, wet the sand with your hose on a light mist setting to make it compact and seal.

4. Weeding Knife

One of the best ways to eliminate weeds in this problem area and keep them out is to weed between the pavers or around your patio routinely. You can get a weeding knife or tool and move along the spaces, scooping the weeds out. You do want to get the root system when you pull the weeds to reduce the chances of them returning. You can find long-handled knives if you have a bad back, and you may want to get something to kneel on while you work.

5. Grow Ornamentals

Weeds won’t grow well if there is steep competition for space in your paver cracks or around the patio. These areas can also look bleak if the stone covers a large area or isn’t a soft color. A nice way to add life to the space is to plant ornamental plants in and around any cracks. Consider adding trailing bellflowers or Mexican fleabane in low-traffic areas and creeping thyme or bugle in areas with more people walking by and on them.

Evergreen Landscaping Can Help with Your Weed Problem

Pesky weeds can be an ongoing battle, especially if you want a neat and tidy yard. If you’ve tried our methods and you’re still having weed problems, contact us. Our staff is happy to come out, survey the situation, and help you get rid of your weeds once in for all.

11 Jan 2023

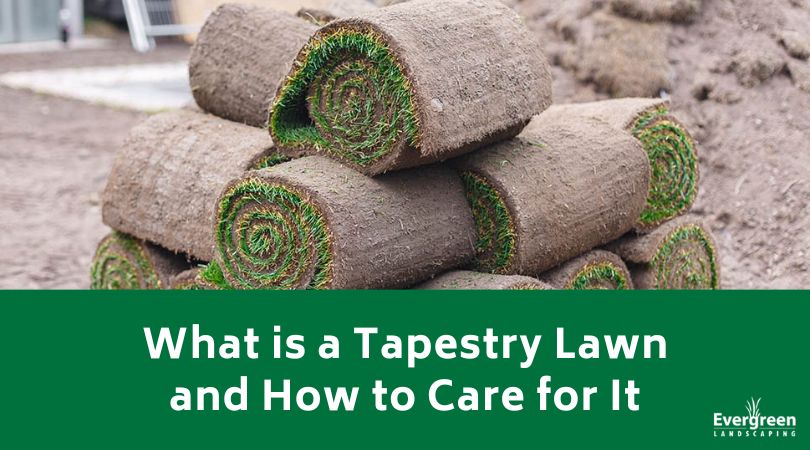
What is a Tapestry Lawn and How to Care for It

What is a Tapestry Lawn and How to Care for It

A tapestry lawn is a term for a popular landscape trend. You may hear it referred to as a meadow lawn, matrix garden, patchwork lawn, or prairie lawn. This setup requires removing your traditional grass and replacing it with a mix of flowers and native plants in different sizes, heights, and textures. Tapestry lawns bring both ecological and aesthetic benefits to your space too.

Defining Tapestry Lawns

As the name implies, a tapestry lawn has a mixture of colorful plants that work to create a pretty piece of art. Most homeowners choose to go for low landscapes, and this lawn can vary in height. It can have lower options that sit between 6 and 10 inches, but you can have your plants’ sizes up to 48 inches, depending on your goals. Generally speaking, your landscape will have plants that offer movement, fill in any gaps, and show a new arrangement from season to season. However, the main difference between a wild setup and your lawn is that you pick the plants for your space with environmental, practical, and aesthetic value.

How to Care for a Tapestry Lawn

Generally speaking, you won’t have to do much maintenance every month if you pick out the right native plants for your climate. Instead, most of the maintenance will be at the start of the season for a small clean-up. Then, you’ll have to turn your sights on mowing, trimming, and picking the best plants.

Choose the Best Plants

Tapestry lawns aren’t one zone or size fits all. When you work inside this landscape, the plants you pick out should grow natively to your area, have low water needs, and be non-invasive. In addition, all the plants you pick out should have similar light, water, and humidity needs, so they all thrive.

To create a flourishing tapestry lawn, you’ll want to choose colorful plants for ground covering, like Moonshadow Euonymus, Japanese Spurge, or Angelina Stonecrop. Since this setup usually doesn’t have any ornamental grasses, you’ll want to put a selection of plants to cover the ground that is resistant to foot traffic and aesthetically pleasing to pull off the lush, full look.

Mowing and Trimming

It’s possible to mow your tapestry lawn using a string trimmer or a mower on the highest setting. If you have a sandy area in your yard, you’ll want to skip it and leave the trimmings in place. You want to make a point to rake the debris out for spots that get more sun.

The idea with tapestry lawns is to allow the plants to take the lead and guide how you maintain your space. You may need to make minor changes, like replacing plants or removing ones that seem too aggressive for the area. However, these lawns generally need much less when it comes to weekly lawn mowing. They all require fewer resources once your plants establish themselves. You won’t have to worry about aerating, watering, or fertilizing.

Evergreen Landscaping Can Help Set up Your Tapestry Lawn

Do you want to set up a tapestry lawn in your yard, but you’re not sure where to start or which plants to choose? If so, contact us. Our staff is ready to set your tapestry lawn up for success and reduce your yard maintenance this season.

09 Nov 2022

Everything You Need to Know About Clover Lawns

Everything You Need to Know About Clover Lawns

Clover lawns recently exploded in popularity on TikTok, and they’re the newest trend in heat-tolerant, drought-friendly, and eco-forward landscape designs. People add clover to their lawns to help offset common issues they have with their lawn as a result of climate change. However, before you jump on this trend yourself, you’ll want to know more about it. So, we’ll highlight the important parts of clover lawns below.

Defining Clover Lawns

A clover lawn is either a mix of traditional turf grass and clover or exclusively clover. Clover is a legume, which means it will draw nitrogen from the air and into the ground, which is very beneficial to the grass, soil, and nearby plants. Also, adding clover means you won’t need to fertilize.

Planting Zones for Clover Lawns

Depending on the species, your clover lawns can thrive in USDA planting zones 3 to 10. It does very well in areas like Texas and California, as they offer dry summers and mild winters. Dutch White Clover is very popular; it spreads and grows rapidly when you start it in the spring. Generally speaking, clover grows best in full sun, especially in zones six to nine. You want to check with your local nursery to see which clover cultivar will work in your climate before you buy it.

How to Plant a Clover Lawn

You may already see some clover scattered throughout your lawn, but the real trick is getting a fuller thatch. To do so, it all boils down to consistent work.

  1. Figure Out the Correct Planting Time
    Spring is the best time to plant your clover. After the first frost passes for the season, mow the lawn. At this point, if your soil’s pH levels aren’t between six and seven, you can amend the dirt by adding fine sand.
  1. Check the Soil
    You have to check and prepare your soil before you plant your clover. Once you do, you’ll want to plant your clover seeds and water them thoroughly until they establish a root system. They grow best in loamy or sandy soil with a pH range of six to seven.
  1. Plant the Clover
    Mix the clover seeds into the sandy loam soil while making sure you cover the whole area. Next, lightly rake the area where you seeded your clover, and water it every day for 10 to 14 days until the seeds start to germinate. Once the seedlings grow leaves, cut back on your watering as you now have an established clover lawn.

How to Care for and Maintain Your Clover Lawn

Once the clover establishes itself, you can sit back and relax. Clover won’t need nearly as much mowing as a traditional lawn, and you shouldn’t have to apply any herbicides or worry about pests. Also, clover won’t turn yellow when your pets go to the bathroom like a traditional lawn will.

Mow Sporadically

As long as your clover gets four to six hours of sun every day, it usually maintains itself. You’ll mow it roughly three or four times every year, but you can adjust this based on your preferences. If you’re after the English garden aesthetic, you can let the clover grow to the maximum height of eight inches.

Contact Evergreen Landscaping

If you want to know more about a clover lawn or get help establishing this lush, green look in your own yard, contact us.

28 Sep 2022

Six Invasive Shrubs to Stay Away From

Six Invasive Shrubs to Stay Away From

No matter if you’re maintaining the garden you already have or working on building up a new one, it’s essential to know which plants can be more of a hassle than a benefit to your space. Below, we’re going to go over a few shrubs that are widely considered to be invasive, and while they may look pretty, you want to stay far away from them.

  1. Autumn Olive (Elaeagnus umbellata)
    Originating in the eastern portion of Asia, this shrub can get up to 20 feet tall and it thrives in zones four to eight. It’s a very hardy plant that grows where other plants fail. However, this determination, means that it spreads very quickly and can take over your garden. You also have to watch for sharp thorns when you’re around it.
  1. Common Gorse (Ulex europaeus)
    Even though this plant is covered in pretty yellow flowers every year, this isn’t enough to cover the fact that it’s a very noxious weed. There are also very high oil levels in this plant, and this makes it more prone to issues with fire. However, this plant has adapted and now grows even faster after it survives a fire. This plant is another one that is covered in sharp thorns.
  1. English Holly (Ilex aquifolium)
    English holly grows best in zones six to nine, and it’s a medium-sized tree or a larger dioecious shrub that gets between 10 and 50 feet tall. The red fruit is the star of this plant in the colder months, but it also means that you’ll have a ton more of this plant popping up. The leaves are very spiny and sharp, and the male cultivars don’t produce any fruit.
  1. European Cranberrybush (Viburnum opulus)
    The name of this invasive shrub references the fruits as they look like a traditional cranberry. After they eat the fruit, birds spread the seeds to help the shrub spread very rapidly. However, it also helps to attracted the viburnum leaf beetle, and they can cause more damage to the surrounding plants. It’s native to Asia and Europe, and this invasive shrub grows well in zones three to eight in part shade to full sun.
  1. Japanese Spiraea (Spiraea japonica, Spiraea japonica var. alpina or Spiraea bumalda)
    This invasive shrub is an imported variety that tends to endanger and take over native spiraea. The main reason why it’s invasive is because it’s so hard to control in landscape designs because the seeds can be dormant for many years. In turn, it’s almost impossible to get rid of completely. It gets up to six feet tall, and this shrub grows best in zones four to eight. It will produce flowers when you plant it in full sun, and this increases the spread.
  1. Multiflora Rose (Rosa multiflora)
    Originating in the eastern portion of Asia, this invasive shrub has stems that will root and widen the original bush anywhere they touch the ground. In turn, the shrub can spread extremely rapidly and take over your garden. It can even form a vine in some cases to help extend the reach and shade out your other plants.

Contact Evergreen Landscaping

Do you want to know more about invasive shrubs to avoid? Maybe you already have some in your yard and you want help removing them. Whatever the reason, reach out and contact the professionals at Evergreen Landscaping today.