Landscaping and Gardening Services in Pismo Beach and SLO County
Mon-Sat: 7:00AM - 5:00PM
03 May 2023

The Best Way To Repair Patches On Your Lawn

The Best Way To Repair Patches On Your Lawn

Maintaining a healthy and green lawn in Southern California can be challenging due to the region’s hot and dry climate. Patches of dead or discolored grass can be a common problem for homeowners, but there are several effective ways to repair these patches and restore the appearance of your lawn.

Identifying the cause of patches

Before you can repair patches on your lawn, it’s important to identify the underlying cause of the problem. Common causes of patches include compacted soil, poor drainage, overwatering, underwatering, fungal diseases, and pest infestations.

If you’re unsure of the cause, you can consult a professional landscaper or extension agent for guidance. Once you’ve identified the cause, you can take steps to address the issue and prevent future patches from occurring.

The best way to repair patches on your lawn

There are several effective methods for repairing patches on your lawn in Southern California, depending on the severity of the issue and your personal preferences. Here are some of the best ways to repair patches on your lawn:

Rake and seed: If the patches on your lawn are small and not too severe, raking the affected area and sowing grass seed can be an effective method of repair. To do this, rake the affected area to remove any dead grass, weeds, and debris. Then, sow grass seed over the area and water it thoroughly. It’s important to keep the soil moist until the new grass has become established.

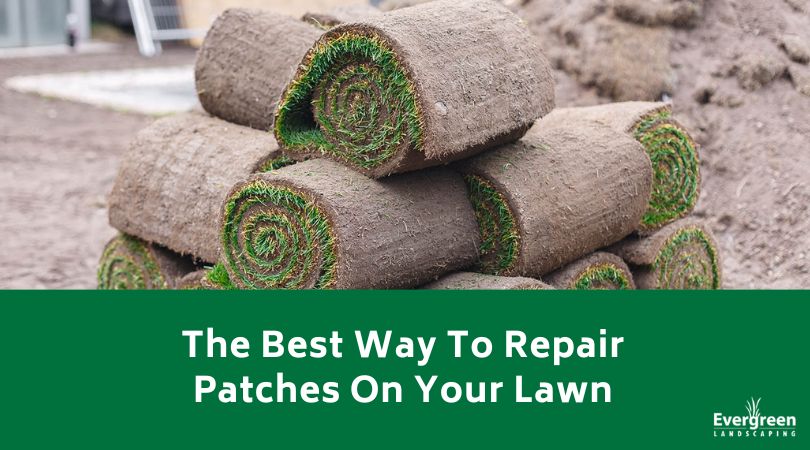
Sodding: If the patches on your lawn are larger or more severe, sodding can be an effective way to repair them. To sod a patch, remove the dead grass and soil from the affected area and level it. Then, lay down a layer of fresh soil and lay the sod over it. Water the area thoroughly and keep it moist until the sod has become established.

Reseeding and fertilizing: If your entire lawn is thin and patchy, reseeding and fertilizing can be an effective method of repair. To do this, rake the entire lawn to remove any dead grass, weeds, and debris. Then, sow grass seed over the entire area and apply a high-quality fertilizer. Water the lawn thoroughly and keep it moist until the new grass has become established.

Topdressing: If your lawn has a thin layer of soil, topdressing can be an effective way to repair patches and improve the overall health of your lawn. To topdress your lawn, apply a layer of compost or topsoil over the entire area and rake it in. This will provide your lawn with additional nutrients and improve soil quality.

Alternative: Artificial turf

If you’re looking for an alternative to repairing patches on your lawn, artificial turf can be a great option. Artificial turf is a low-maintenance and long-lasting alternative to natural grass. It looks and feels like real grass, but requires no mowing, watering, or fertilizing. Additionally, artificial turf is more durable than natural grass and can withstand heavy foot traffic, making it a great option for families and pets.

Installing artificial turf involves removing the existing grass and soil, installing a layer of crushed stone, and laying the artificial turf over it. The turf is secured in place with stakes and filled with a layer of sand or rubber crumb infill.

Artificial turf can be a great option for homeowners who want a low-maintenance and long-lasting lawn that looks and feels like real grass. Additionally, artificial turf can save water and reduce your water bill, making it an environmentally friendly option.

It’s important to note that artificial turf does require an initial investment and installation cost, but it can save you money in the long run by eliminating the need for watering, mowing, and fertilizing. Additionally, artificial turf is a great option for homeowners who live in areas with drought conditions or water restrictions, as it doesn’t require any water to maintain its appearance.

Another benefit of artificial turf is that it is more resistant to pests and disease than natural grass. This means that you can avoid the use of harmful pesticides and chemicals that can harm beneficial insects and pollinators.

In addition to being low-maintenance and durable, artificial turf is also very versatile. It can be used for a variety of applications, including sports fields, playgrounds, and landscaping. Artificial turf can be customized to fit any shape or size, and can be designed to look like natural grass or any other surface.

Repairing patches on your lawn in Southern California requires identifying the underlying cause, choosing the right repair method, and taking steps to prevent future patches from occurring. Whether you choose to repair patches naturally or install artificial turf, it’s important to take care of your lawn to keep it healthy and looking green. With the right knowledge and care, you can have a beautiful and healthy lawn that you can enjoy for years to come.

19 Apr 2023

How to Remove and Prevent Weeds from Growing on Patios and Pavers

How to Remove and Prevent Weeds from Growing on Patios and Pavers

Patios and pavers are a beautiful addition to any outdoor space, but they can quickly become overrun with weeds. Weeds can be unsightly and even cause damage to your patio or pavers. Here are some simple and effective ways to remove and prevent weeds from growing on your patio or pavers.

How to Remove Weeds from Patios and Pavers

  • Use boiling water: Boiling water is a simple and effective way to kill weeds. Pour the boiling water directly onto the weeds, making sure to cover the entire plant. This will kill the weed and prevent it from regrowing.
  • Use cornmeal: Sprinkling cornmeal on your patio or between your pavers can help prevent weeds from growing. Cornmeal contains a natural fungus that kills weed seeds. Simply sprinkle the cornmeal over the areas where you want to prevent weeds from growing.
  • Use baking soda: Baking soda can be used to dry out and kill weeds. Sprinkle baking soda directly onto the weeds, or mix it with water to create a solution that can be sprayed on the weeds. This will dry out the weeds and kill them.
  • Use a mixture of salt and water: Mix salt and water in a spray bottle and spray directly onto the weeds. The salt will dehydrate the weeds and kill them. Be careful when using this method, as salt can be harmful to surrounding plants.
  • Use a natural weed killer: You can make your own natural weed killer by mixing vinegar, salt, and dish soap. This solution can be sprayed directly onto the weeds and will kill them. However, be careful when using this solution on your patio or pavers as it can stain or discolor some materials.

How to Prevent Weeds

  • Regularly sweep or blow your patio: One of the simplest ways to prevent weeds from growing is to remove any dirt, debris, and fallen leaves from your patio. This will prevent weed seeds from taking root and growing.
  • Apply a weed preventer: Apply a weed preventer to your patio and between your pavers. Look for a product that is specifically designed for use on patios and pavers, and follow the instructions carefully. This will prevent weeds from growing for a certain period of time.
  • Use landscape fabric: If you’re installing a new patio or pavers, lay down landscaping fabric before laying the stones. This will prevent weeds from growing up through the cracks. Be sure to overlap the edges of the fabric by at least 6 inches.
  • Use polymeric sand: Use polymeric sand when filling in the gaps between pavers. This type of sand has a polymer added to it that hardens when it gets wet, creating a solid barrier that prevents weeds from growing in between pavers. Be sure to sweep the sand into the gaps and then wet it down to activate the polymer.
  • Seal your patio or pavers: Sealing your patio or pavers can help prevent weed growth by creating a barrier between the soil and the surface of your patio. Choose a sealer that is specifically designed for use on your patio or pavers and follow the instructions carefully.
  • Use natural remedies: Sprinkle baking soda, salt, or cornmeal in between the pavers and on your patio to prevent weeds from growing. This will help prevent weed seeds from taking root and growing.

When it comes to preventing weeds from growing on your patio or pavers in Southern California, timing is key. Applying weed preventers at the right time can ensure that they are most effective in preventing weed growth. Here are some tips on when to apply weed preventers in Southern California:

  1. Apply in the dry season: In Southern California, the dry season typically lasts from May to October. This is the ideal time to apply weed preventers, as there is less rainfall and moisture to activate weed seeds. Applying weed preventers during this time can help prevent weed seeds from germinating and taking root.
  2. Apply before laying pavers: If you’re planning on installing a new patio or pavers, consider applying weed preventers before laying them down. This will prevent weed seeds from taking root in the gaps between the stones.
  3. Apply after weeding: If you’ve recently removed weeds from your outdoor space, it’s a good idea to apply a weed preventer to prevent new weeds from growing. Make sure to apply the weed preventer after removing the weeds to ensure that it is most effective.
  4. Pay attention to instructions: If you’re using a commercial product, be sure to check how frequently you should reapply.

Removing and preventing weeds on your patio or pavers can be a simple and straightforward task when you use the right methods. By using these tips, you can keep your outdoor space weed-free and looking great all year round. Of course, if you’re tired of handling weeds by yourself, you can give us a call and set up routine landscape maintenance!

05 Apr 2023

What is No Dig Gardening

What is No Dig Gardening

Gardeners who are looking for an easier and more efficient way of gardening should consider no dig gardening, also known as “no till” gardening. This method of gardening has been gaining popularity in the gardening world. It offers many advantages over traditional gardening methods, and it’s particularly popular among those who want to reduce their workload or are looking for an environmentally-friendly way of gardening.

Benefits of No Dig Gardening

One of the biggest advantages of no dig gardening is that it reduces the amount of labor involved in preparing the soil for planting. Traditional gardening methods often require the soil to be tilled or dug up to loosen it and make it easier for plants to take root. This can be a time-consuming and physically demanding process, especially for those with large gardens. With no dig gardening, there’s no need to till or dig up the soil. Instead, organic materials are layered on top of the soil, allowing nature to take its course.

One of the advantages of no dig gardening is that it can be easier on the gardener’s body. Traditional gardening methods such as tilling can be physically demanding and can lead to back pain or other injuries. With no dig gardening, there’s no need for heavy machinery or back-breaking labor.

No dig gardening can also be a cost-effective option for gardeners. While traditional gardening methods may require the purchase of expensive equipment such as tillers or shovels, no dig gardening requires only the purchase of organic material, which can often be obtained for free or at a low cost.

No dig gardening also helps keep weeds at bay. When organic material is layered on top of the soil, it blocks out light, preventing weeds from germinating. This means that you’ll spend less time weeding and more time enjoying your garden.

No dig gardening can be a more sustainable option than traditional gardening methods. Tilling the soil can release carbon into the atmosphere, contributing to climate change. No dig gardening helps to preserve the soil’s natural structure and can even help to sequester carbon from the atmosphere. When soil is tilled or dug up, it can disturb the soil’s natural structure and disrupt the ecosystem that exists within it. No dig gardening helps maintain the soil’s natural structure, which can be beneficial for soil health and biodiversity. No dig gardening also helps conserve water. When organic material is layered on top of the soil, it provides insulation for moisture in the ground, reducing the amount of water that evaporates. This can be particularly beneficial in areas with limited water resources.

In addition to being more environmentally-friendly, no dig gardening can also be a more aesthetically pleasing option for gardeners. Traditional gardening methods can result in soil erosion or compacted soil, which can be unsightly. No dig gardening helps to maintain the natural beauty of the soil and can result in a lusher and more vibrant garden

How to Plant a No Dig Garden

Creating a no dig garden is relatively easy. To get started, simply layer organic materials on top of your existing soil. Good options include compost, manure, grass clippings, leaves, and straw. Over time, the organic material will decompose and enrich the soil, creating a nutrient-rich environment that is perfect for growing plants. No dig gardening can be used for both vegetable and flower gardens, and it’s a great option for both beginners and experienced gardeners. The key is to choose materials that are free from pesticides and other harmful chemicals, and that will break down easily over time.  Second, you’ll want to make sure you’re using enough organic material to create a thick layer that will block out light and suppress weeds. Finally, it’s important to monitor your garden regularly to make sure it’s growing healthy and strong.

Another important consideration for no dig gardening is soil health. While no dig gardening can help to maintain the natural structure of the soil, it’s still important to ensure that the soil is healthy and nutrient-rich. This can be achieved using organic fertilizers or by incorporating other amendments into the soil, such as bone meal or blood meal.

One potential challenge of no dig gardening is that it can take longer for the soil to warm up in the spring, which can delay planting. However, this can be mitigated by using black plastic or other materials to help trap heat and warm up the soil more quickly.

In conclusion, no dig gardening is a simple, easy, and efficient way of gardening that offers many benefits over traditional gardening methods. By using organic materials to create a nutrient-rich soil base, no dig gardeners can reduce labor, suppress weeds, conserve water, and maintain a healthy ecosystem within their gardens. Whether you’re a beginner or an experienced gardener, no dig gardening is definitely worth considering for your next gardening project.

If you’re ready to bring your home to full bloom this Spring, contact us today!

08 Mar 2023

Seasonal Vegetable Planting Calendar – Winter, Spring, Summer, Fall

Seasonal Vegetable Planting Calendar

Many gardeners are unsure what to grow and when to start their vegetables. While garden centers are packed in spring with seedlings, it’s not the only season you can plant. Not every zone allows for year-round gardening, but most will give you three seasons’ worth of planting time. We’ll outline what to grow and when to maximize your yields below to take full advantage of this.

Spring Vegetables – March, April, and May

This is when the weather starts to warm up, and you can plant cold-tolerant vegetables in March. This includes broccoli, cabbage, cauliflower, endive, potatoes, head lettuce, onions, radishes, peas, onions, turnips, spinach, and beets.

You can plant chard, collard, leaf lettuce, carrots, onion sets, and salsify in April. At this time, some of the vegetables you grew in the middle of March can be ready to go, including radishes and lettuce.

By the time May rolls around, spring is in full swing. Most traditional gardening starts this month, and you can plant lima and snap beans, eggplants, cucumbers, peppers, melons, pumpkins, okra, sweet corn, sweet potatoes, winter and summer squash, and tomatoes. Also, it’s time to harvest some things you planted in April, including collard, leaf lettuce, green onions, lettuce heads, spinach, and peas.

Summer Vegetables – June, July, and August

Summer brings pests and bugs to your garden, but the planting and harvesting processes continue. By June, your collards, cabbage, snap beans, carrots, chard, endives, broccoli, lettuce, cauliflower, peas, green onions, turnips, beets, and late spinach will be ready to harvest. In addition, you can sow more snap beans, sweet corn, and cucumbers to lengthen your summer harvest.

When you get to July, you’ll start planting your fall crops. Carrots, cabbages, cauliflower, turnips, and broccoli are ready to harvest. Snap beans, potatoes, summer squash, and cucumbers should be growing nicely at this point, and your peppers, melons, tomatoes, and sweet corn should be almost ready to harvest. Replant another round of broccoli, cabbage, carrots, and cauliflower to harvest in the fall.

In August, you’ll focus more on harvesting than planting. Cucumbers and beans are usually a considerable harvest at this point, and both watermelon and eggplants are ripening. In addition, okra, peppers, summer squash, sweet corn, and tomatoes are ready to harvest, and you can replant your lettuce, radishes, spinach, kale, beets, and turnips for a late-season harvest.

Fall Vegetables – September and October

Once the weather gets less predictable and the leaves start to turn, the seasons shift to fall. Everything that didn’t ripen in August will finish in September and October. You’ll be able to harvest cucumbers, lima beans, peppers, eggplants, squash, sweet corn, tomatoes, pumpkins, and winter squash. If you planted a second round of your crops for a fall harvest, you’ll enjoy carrots, cabbages, broccoli, beets, lettuce, cauliflower, spinach, radishes, and turnips.

Depending on the local climate, you may be able to plant a few winter vegetables at this point. Spinach, leaf lettuce, and turnips are all viable options to consider.

Winter Vegetables – November

Any straggler vegetables that were still ripening in October should be ready to harvest now. In addition, a few early varieties you planted in early to mid-October should be ready to pick at the end of November or the beginning of December. Baby spinach is a very popular crop this time of year, and it’s time to dig up any beets or potatoes you left in the ground from the last planting session.

Contact Evergreen Landscaping for More Information on Growing Vegetables

If you’d like to learn more about which vegetables thrive in your planting zone, contact us. We’re happy to help set up a planting schedule to ensure you get a large harvest throughout the seasons.

08 Feb 2023

Easy Ways to Remove Weeds from Patios and Pavers

Easy Ways to Remove Weeds from Patios and Pavers

You want your pavers to look nice, but weeds can make this a challenge when they start popping up in the cracks. To make matters worse, different weeds have varying root systems, so getting rid of them for good can be difficult. We want your walkways or paths to look nice, so we’re going to highlight several easy ways to remove weeds from your pavers or patio below.

1. Boiling Water

Pouring boiling water on the weeds is a quick and easy way to remove them from the cracks. This trick works nicely for stubborn perennial weeds like dandelions. Start by pulling or cutting the leafy tops off, and then carefully pour the boiling water into the cracks. Some perennial weeds can come back, but they should die off after two or three treatments.

2. Vinegar

Vinegar can be a good option to remove young perennial or annual weeds, but it won’t work well to kill off established perennial weeds. Also, vinegar will alter the soil’s nutrient composition and make it harder for things to grow, so you must be careful when applying it. Remove the upper leafy portion of the plant first and pour the vinegar directly into the cracks. You want to use white vinegar instead of red because red vinegar can stain the pavers.

3. Good Pointing

If the soil between the pavers is loose, it is easier for the weeds to push through it. First, remove the weeds with any tool you like to give yourself a clean working space. Dig out the soil or hit it with a quick blast of water from the pressure washer. Next, pour polymeric sand into the cracks, ensuring you brush off as much from the paver or patio surface as possible. To finish, wet the sand with your hose on a light mist setting to make it compact and seal.

4. Weeding Knife

One of the best ways to eliminate weeds in this problem area and keep them out is to weed between the pavers or around your patio routinely. You can get a weeding knife or tool and move along the spaces, scooping the weeds out. You do want to get the root system when you pull the weeds to reduce the chances of them returning. You can find long-handled knives if you have a bad back, and you may want to get something to kneel on while you work.

5. Grow Ornamentals

Weeds won’t grow well if there is steep competition for space in your paver cracks or around the patio. These areas can also look bleak if the stone covers a large area or isn’t a soft color. A nice way to add life to the space is to plant ornamental plants in and around any cracks. Consider adding trailing bellflowers or Mexican fleabane in low-traffic areas and creeping thyme or bugle in areas with more people walking by and on them.

Evergreen Landscaping Can Help with Your Weed Problem

Pesky weeds can be an ongoing battle, especially if you want a neat and tidy yard. If you’ve tried our methods and you’re still having weed problems, contact us. Our staff is happy to come out, survey the situation, and help you get rid of your weeds once in for all.

11 Jan 2023

What is a Tapestry Lawn and How to Care for It

What is a Tapestry Lawn and How to Care for It

A tapestry lawn is a term for a popular landscape trend. You may hear it referred to as a meadow lawn, matrix garden, patchwork lawn, or prairie lawn. This setup requires removing your traditional grass and replacing it with a mix of flowers and native plants in different sizes, heights, and textures. Tapestry lawns bring both ecological and aesthetic benefits to your space too.

Defining Tapestry Lawns

As the name implies, a tapestry lawn has a mixture of colorful plants that work to create a pretty piece of art. Most homeowners choose to go for low landscapes, and this lawn can vary in height. It can have lower options that sit between 6 and 10 inches, but you can have your plants’ sizes up to 48 inches, depending on your goals. Generally speaking, your landscape will have plants that offer movement, fill in any gaps, and show a new arrangement from season to season. However, the main difference between a wild setup and your lawn is that you pick the plants for your space with environmental, practical, and aesthetic value.

How to Care for a Tapestry Lawn

Generally speaking, you won’t have to do much maintenance every month if you pick out the right native plants for your climate. Instead, most of the maintenance will be at the start of the season for a small clean-up. Then, you’ll have to turn your sights on mowing, trimming, and picking the best plants.

Choose the Best Plants

Tapestry lawns aren’t one zone or size fits all. When you work inside this landscape, the plants you pick out should grow natively to your area, have low water needs, and be non-invasive. In addition, all the plants you pick out should have similar light, water, and humidity needs, so they all thrive.

To create a flourishing tapestry lawn, you’ll want to choose colorful plants for ground covering, like Moonshadow Euonymus, Japanese Spurge, or Angelina Stonecrop. Since this setup usually doesn’t have any ornamental grasses, you’ll want to put a selection of plants to cover the ground that is resistant to foot traffic and aesthetically pleasing to pull off the lush, full look.

Mowing and Trimming

It’s possible to mow your tapestry lawn using a string trimmer or a mower on the highest setting. If you have a sandy area in your yard, you’ll want to skip it and leave the trimmings in place. You want to make a point to rake the debris out for spots that get more sun.

The idea with tapestry lawns is to allow the plants to take the lead and guide how you maintain your space. You may need to make minor changes, like replacing plants or removing ones that seem too aggressive for the area. However, these lawns generally need much less when it comes to weekly lawn mowing. They all require fewer resources once your plants establish themselves. You won’t have to worry about aerating, watering, or fertilizing.

Evergreen Landscaping Can Help Set up Your Tapestry Lawn

Do you want to set up a tapestry lawn in your yard, but you’re not sure where to start or which plants to choose? If so, contact us. Our staff is ready to set your tapestry lawn up for success and reduce your yard maintenance this season.