Landscaping and Gardening Services in Pismo Beach and SLO County
Mon-Sat: 7:00AM - 5:00PM
17 Feb 2020

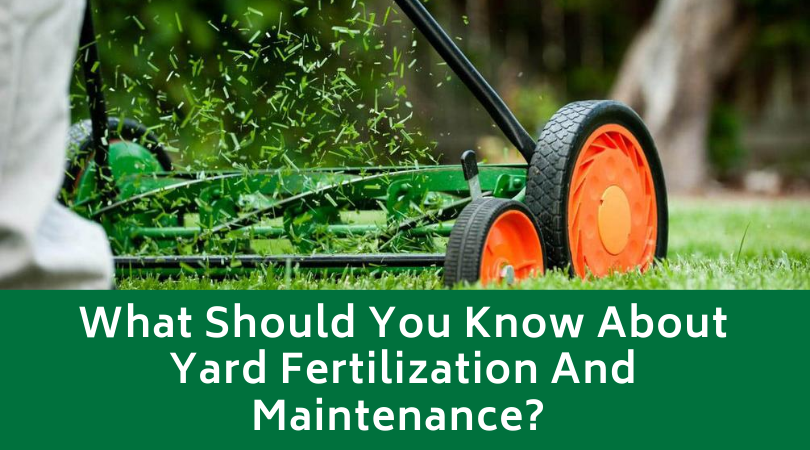
What Should You Know About Yard Fertilization And Maintenance?

What Should You Know About Yard Fertilization And Maintenance

Spring is the season which poets adore. After a cold winter, warmer winds come, and the sun starts to shine. The plant world wakes up from a deep slumber, and new beautiful flowers begin to blossom. Gardening is proof that patience can take you a long way. You need to feed, nurture and water a seed until it cracks, starts growing, and then finally blossoms into a masterpiece.  

No matter if you have a few pots on the balcony or entire acres of land, taking care of a yard will make a family bond better, and it has a lot of benefits. You can get fresh vegetables, aromatic herbs, and some of them sprout almost instantaneously. Click on this link to read more. 

What are the benefits of maintaining a garden? 

yard maintenance 2

First of all, the main benefit is that you get out in the sun and you get moving. Our entire culture has shifted in the past hundred years. Most of our lives are in front of the computer. Our eyes are thankful when we look away from the blue screens and into something green and full of chlorophyll.  

Yard work is considered as an activity which is moderately intense. Thirty minutes of movement every day is critical when it comes to having a healthy heart. Since you squat a lot during this time, you also get a gentle stretch in the pelvic region, which improves digestion and posture.  

If you have small kids, then this will be a great time to teach them how beautiful the outside world is. Most kids today are stuck inside playing video games, and they don’t want to go outside. Gardening is a great way to show them the magnificence of exploring the outside world.  

When should you fertilize your lawn? 

yard maintenance 3

We can’t survive without food. The same thing applies to plants. If they don’t get enough nutrients, they will wither and die. That’s why you need to use fertilizer. It’s a key component in maintaining the look and the health of your lawn or garden. But, when you look around most neighborhoods, no one seems to be doing it.  

Most people don’t know how to fertilize when to do it, or which products to use. Another thing that complicates the process is that if you have no idea what you’re doing, you can put too much or too little, and that can be harmful to the flora. Luckily, there are a few rules that you can follow to make sure your garden is always on point. 

Most people wonder which is the correct day to start. No one knows the exact day, but most people can tell from the weather and the temperature outside that mid-April is a perfect time. If you want to be a bit more scientific, you could get a thermometer and measure the soil.  

As soon as it crosses over 55 degrees Fahrenheit, you can start fertilizing. If you don’t live in America, then the temperature is 12.8 degrees Celsius. If you don’t want to go in that much detail, just check if there are any lilacs blossoming. Either that, or when the grass starts to grow.  

What do the numbers mean? 

When you go to the store, there will be many different labels on the bags. Most of the time, there are three letters and three numbers. The first letter is N, which means nitrogen. The second one is P, which means phosphate. And the final one is K, which means potassium. These three ingredients have everything your garden will need during the entire season.  

The numbers mean percentages. So, for example, if you get a bag that says 20 – 10 – 10, that means there’s twenty percent nitrogen, ten percent phosphate, and ten percent potassium. The rest of the ingredients are fillers that make sure all the material is evenly distributed. The best bag to use in the spring is a 20-5-10.  

Fast Release or Slow Release? 

yard maintenance 4

When you think of the perfect breakfast in the morning, it usually involves a piece of toast, a few eggs, and bacon, with a cold glass of orange juice. These foods have all the necessities that can keep us going throughout the day. Not only that, but it takes a long while to digest them. That gives us energy for a more extended period of time. Well, the same logic applies to plants.  

Slow-release fertilizers work great because of the same reasons. Not only that, but you can also wait longer before you need to apply it again. Instead of doing it every four weeks, you can do it every six to eight weeks. The correct time depends on when you water the lawn. Additionally, you need to pay extra attention to the nitrogen.  

This is the compound that makes your grass grow, and it is also responsible for giving it that bright green color. The optimal amount should be one-tenth of a pound per week. More is not always better. If you put more, the grass will not get any greener. It will only start growing faster.  

This means you’re going to have to mow it more often. Or, if someone else is doing it for you, you’re essentially giving away free money. The best thing you can do is make it look like a glowing emerald without the grass growing super-fast.  

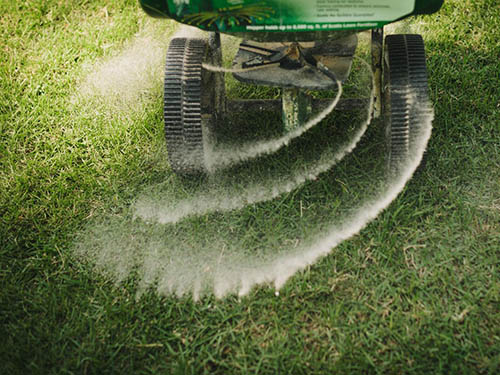
Should you mimic the pros, or use granules? 

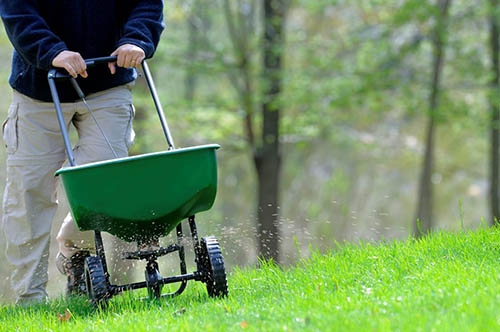
If you’re a casual homeowner, the best solution is to use granules. They are amazingly simple to use with the help of a spreader. That takes a bit more time than a professional such as Omaha NE Lawn services who have been doing it for a long time. However, pros have a tanker truck with them, and they are doing it multiple times a day.  

Unlike regular hobbyists, they take wind speeds into consideration to make sure everything is sprayed in such a short time. If you try to use a sprayer, it will be more challenging to get it evenly across the entire yard. This will make some of the herbs on one side taller than the other. That means you’re going to have to micromanage the growth every weekend. Instead, opt for granules that are much easier to apply accurately.  

How should you plan the applications? 

We mentioned above that the first application needs to happen somewhere around mid-April. You get the exact day if you use a soil thermometer or if you see any lilacs blossom. But after waking up from the winter, the soil is malnourished and needs feeding.  

Schedule the next fertilization to be around four weeks after the first application. That means that the next time you bring out the bag should be in mid-May. After these two, you can wait a month and a half, up to two months. However, manure is best to use the third and fourth time. That’s an organic compound, and it will be much better.  

It will be smelly for a few days, but that’s how nature works. Finally, you should remember the feeding time in the fall. Even if the grass begins to wither, the roots are still there. The best option for this time should be a fall fertilizer, which is high in potassium and phosphorous. This will make sure the roots are healthy, and they will survive the winters with no problems.  

When should you water the lawn? 

There are two ways you can approach this. The first way is to get an automatic sprinkler and set it up on a timer to spray two times a day. The second option is a bit more fun. You take a hose and a pair of flip flops, and you go outside. If you have kids, a Sunday morning might be a great time to have a water balloon fight.  

Since it’s a lawn, its primary use is for you to enjoy it and have fun on it. On the other hand, looking at a meticulously shaped yard is something that also brings a lot of joy to people. In both cases, you should note that the more you water the soil, the more fertilizer it will need. If you have an automated system, then the optimal time between feeding should be around six weeks.  

If you take a hose and spray it every other day, then you can add two more weeks to that period. Finally, remember to read the labels on the bag you’re using. For example, granules need water so they can break up and be absorbed. Some other types need to be sprayed on wet ground.  

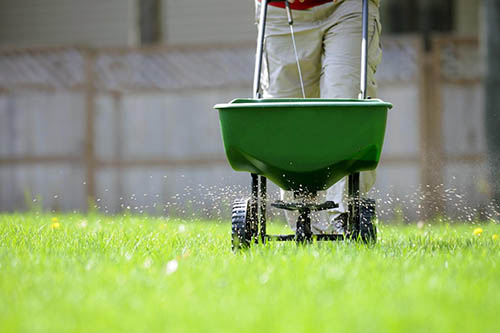
How to use a spreader? 

Before you do anything else, make sure that the hopper is shut before you start filling the device. So many people forget about this small detail, and then they find themselves in a pile of granules. That should be known as lesson number one since everybody does it at least once. You won’t know the value of a closed hopper before you need to clean up every single granule.  

Now, as long as that’s done, you can park it in your patio or driveway, it doesn’t matter. If you don’t want to use a broom at all, you can put a tarp under it. The same method is used if you start off on the grass because too many granules in one spot could kill the plants. Follow this link for more info https://www.popularmechanics.com/home/lawn-garden/how-to/g237/the-quick-and-easy-guide-to-fertilizing-your-lawn/ 

Also, when you’re buying the equipment, make sure you get a broadcast type. It costs around thirty bucks, and you only have to buy it once, and you can use it for years. The way this type of spreader works is it throws the granules much further away, and there won’t be any stripes anywhere.  

Of course, while you’re doing this activity, you need to walk with the same speed. If you walk fast, then slow, you won’t get the desired effect. A slow, steady pace that evenly distributes the fertilizer is optimal. Anything else will cause thin and thick spots, and no one wants that. When you read the product description, it always says to use a bit more of it.  

That’s not a rule you should follow. Always start with less. And many professionals recommend that fertilizing a bit less is much better than a bit more. The reason they say this is because too many phosphates could burn the flora.  

That’s a waste of money, and you don’t want any naked spots as soon as spring begins to fade away. Finally, when you finish the job, take a broom, and collect the remaining granules. No matter how careful you try to be, there will always be some things that will miss the goal. There’s bound to be a few on the street, driveway, and patio.  

Many people think that the rain will wash that away. It’s true that the rain will wash them away, but that’s how many chemicals get in the rivers. And we all drink water from the rivers. It’s safer for the environment to spend a few minutes and clear up the mess we’ve made. 

When you finish doing that, you can put the remainders in the same bag. Then close it up, put it somewhere in a shed or a garage where it’s cold and dry.  

What are some projects for a family garden? 

If you have kids, a great way to teach them about chores and how to take care of things is to start a garden project. For this, you might ask some neighbors in the area what kinds of plants grow best on the soil you have in the neighborhood.  

From here on out, you can go and purchase some seeds or seedlings of vegetables that your children love. It’s definitely worth to try and grow some veggies and make a salad out of them. The taste is a thousand times better than buying them in a store.  

You can also taste all of the hard work you’ve done together. Peas, cucumbers, and tomatoes are some of the top picks that grow quite fast. If you want something that’s a bit prettier, you could always choose some delicate and beautiful flowers.  

06 Feb 2020
How to Create a Roof Garden on My House

How to Create a Roof Garden on Top of My House

Rooftop gardens are a beautiful addition to any urban home or business. You can add herbs, flowers, shrubs, and edible plants. However, this will take some time and a few practical steps. This is what we’ll outline for you below.

1. Prep Your Roof
You want to find out how much weight your roof can safely hold. This is the loading capacity. A structural engineer can give you an exact weight. You’ll have to use this weight to make sure all of your plants, furniture, equipment, plant containers, dirt, and weather conditions don’t overload your roof.

2. Check Building Codes
Go to your local city hall and check with your building codes. You may end up with regulations that govern how tall or large your garden can be. They may even stop you from building one. See if you need any permits and special features while you’re there.


How to Create a Roof Garden on My House

3. Monitor the Sun Exposure
Monitor how much sun your roof gets over one or two weeks. This will give you a good idea of what you can and can’t have. Monitor it in the morning, midday, and evening hours. Make a note of any heavily shaded areas.

4. Map Out Your Garden Design
Take a sheet of graph paper and map out your garden’s design. Plot out where your plants will go, your furniture, and any features you want to have. You can measure your roof beforehand and scale your sketch to match your space.

5. Connect a Hose
Connect a hose that will go to your roof. If there is a water line or faucet on your roof, connect your hose there. This will make watering your new rooftop garden an easy process. You can also rig up water containment systems if there is no hose attachment.

6. Get Your Gardening Supplies
Go shopping and pick out your containers. You can get metal, wood, terracotta, ceramic, and more. You may want to pick out a trellis too for any climbing plants. Choose plants that are heat and drought-resistant. Native plants, ornamental shrubs, and ornamental trees are good choices. Avoid plants with big leaves because they tend to burn. Pick out your potting soil too.

7. Set Up Your Garden
Once your plants are in their containers, it’s time to set up your garden. Lay your plants out on the rooftop as you had on your design. You can pick a focal point and arrange your garden around it, or you can use all of the space to flow from one area to the next.

8. Add Decorations
When you get your garden set up, it’s time to add all of the small decorations that make it unique. You could have lightweight furniture, a birdhouse, an umbrella for shade, and a small table. Choose pieces that have a multi-functional design to make the most out of your space.

9. Maintenance
Be prepared to perform routine maintenance on your garden. You’ll want to water it in the cooler hours of the day like early morning or late afternoon. Trim back plants as they get too long, fertilize, and re-pot them as necessary. 

Contact Evergreen Landscaping

Are you ready to set up your new rooftop garden? If so, contact us. We can help you decide the perfect plants, how to set up your garden, and how to keep it healthy.

22 Jan 2020
What are the Advantages of Artificial Grass

What are the Advantages of Artificial Grass?

What benefits come with choosing artificial grass for your home or business? While sports fans may be well aware of the benefits of artificial turf, you can successfully incorporate it into your home. It’s popular in landscaping in drought-prone areas, and it offers a stunning curb appeal. Let’s take a quick look at the biggest benefits of artificial turf below. 

1. Stunning All Year Round

If you live in a region where you have seasons, your grass is going to look dead, dry, and brown at least part of the year. This could be in the scorching summer sun, or the fall and spring before it green up again. However, artificial turf looks green, healthy, and beautiful all year-round. No matter the season, you’ll have a stunning yard. 

2. No Water or Maintenance

Arguably, one of the biggest benefits of artificial turf is that it doesn’t need water or maintenance like traditional grass. You don’t have to mow it, trim it, fertilize it, or water it to keep it looking healthy. Instead, you sweep the leaves or debris off, and it’s good to go. In turn, you can enjoy your yard more while spending more time on things you enjoy. 

3. Environmentally-Friendly

Since this is synthetic grass and you don’t have to use electric or gas-powered machines to maintain it, it’s more environmentally-friendly than traditional grass. Simply sweeping it will clear away any loose debris without impacting your direct environment. 

What are the Advantages of Artificial Grass

4. Uniform and Even Look

Traditional grass can form brown spots or wear out if people walk in one particular area. These are unsightly, and they can make your entire yard look less than perfect. Artificial turf doesn’t have this problem. It doesn’t wear out from repeated walking over it, and you won’t get brown or dead spots. Instead, you get a beautifully uniform look. 

5. Direct Sunlight Isn’t a Problem

When the sunlight beats down on your grass day after day, it can cause it to burn and die off. Once your grass dies, it’s very hard to get it back, especially if you have no shade to shield it. Artificial grass can withstand direct sunlight day in and day out without a problem. It won’t fade, burn, or die. 

6. Safe for Pets and Kids

A lot of people use pesticides or fertilizers on their real lawns, and this can be dangerous for your kids and pets if they come into contact with it. You won’t need any of these things for artificial grass, and some of it even has an antibacterial coating formulated right into the fibers. This makes it healthier and safer. 

7. Cost-Effective

You have to pour money into a real lawn to keep it looking great year after year. It’s important you factor in seed, fertilizer, pesticides, water, gas for your lawn mower and lawn care equipment, and maintenance. Synthetic grass can last 10 to 15 years with minimal effort on your part. It’s more cost-effective, and it saves you time. 

Contact Evergreen Landscaping for Artificial Turf

If you’re ready to turn your yard into an oasis, start with installing artificial turf. Reach out and contact us with questions.

08 Jan 2020
5 Things to Consider when Designing a New Landscape for Your Yard

5 Things to Consider when Designing a New Landscape for Your Yard

Whether you want to make a few changes to your existing landscape or perform a complete overhaul, there are five important factors to consider while you lay out your plan. Many people run straight to their local garden supply store without planning, but creating a plan beforehand will help you create a stunning landscape that thrives. We’ll outline the five most important things to consider when you design a new landscape for your yard below. 

1. Think About Your Theme

Having a theme can help you create a seamless landscape that flows from one area to another, and it can help you choose your materials and plants. Your theme can be something as simple as using consistent forms and shapes throughout your design, or they can be as complicated as designing an Oriental or relaxation garden.

An excellent place to start is by taking a look at your home’s architecture. The goal is to create a theme that complements your home’s styles and lines because your yard is an extension of your home. Your theme will help you place your decorations, plants, structures, and hardscapes. 

2. Your Yard’s Characteristics

Think about your yard’s topography, regional climate, and soil type when you plan your new landscape. The USDA Plant Hardiness Zone Map is an excellent tool to help here. You also want to look at your yard’s microclimate and consider the shade and sun exposure when you pick your plants. Microclimates will be on the plants you choose, and they’re usually labeled as deep shade, shade, partial shade, or full sun. 

3. Maintenance

No matter which type of landscape you design, how difficult your maintenance is will be a big factor. For example, having lots of hardscapes and ornamental flower beds may look pretty, but they can be difficult and time-consuming to maintain. You should leave enough space to fit your lawn equipment around them, and decide if you plan to maintain it on your own or hire someone to do it for you. The more complicated it is, the more you’ll pay someone. 

5 Things to Consider when Designing a New Landscape for Your Yard

4. Planting Structure

When you pick out your plants and structures, make sure you think about your visual planes. Start from above you and work your way down, remembering to include trees or archways.

Next, look at your vertical space and consider how far apart or close together; you want to place your plants. Decide if you want to stagger or layer plants, and keep the plant’s widths and heights in mind. Most people tuck smaller plants in between and in front of larger plants. Finally, include your hardscapes, groundcovers, and how you’ll group your smaller plants. 

5. Keep the Future in Mind

As your landscape grows and matures; it’ll change. When you pick out your plants, take their maintenance needs, growth rate, and the mature size into consideration. Every plant should have enough room to accommodate their mature size, or close to it. 

Contact Evergreen Landscaping Today

If you’d like help designing your new landscape, get in touch. Our professional staff is ready to help you design the perfect landscape for your home.


18 Dec 2019
7 great gardening apps

7 Great Gardening Apps to Check Out

7 great gardening apps

When spring and summer hit, it’s time to get outside and enjoy your garden. No matter if you’re a seasoned gardener or a beginner, it’s easy to lose hours puttering around. You can now get a digital helping hand in the form of apps, and we’ve picked out seven of the top ones below.

1. Garden Plan Pro
This app can do just about everything. You can use it to lay out and design your garden from scratch. Place fruit, vegetables, and herbs where they would grow the best and rearrange them in the app. You’ll get a complete guide of growing information for almost 200 plants. There are thousands of varieties available as well. It teaches you how to rotate your crops, when to harvest, and when to plant.

2. Garden Compass
Excellent for beginners, Garden Compass comes with a personalized care calendar. It helps you stay on top of everything. You’ll get plant identification services, monthly reminders, and advice in the free app. If you choose to buy the premium membership, you’ll get curated guidance based on your product choices.

3. Permaculture
If you’re a visual learner, Permaculture has a host of advice, tips, and videos available. You can get visual news and text as well. This app will give you guidance on how to renovate parts of your garden and tame the area around it. It’s interesting to watch even if you don’t plan on putting it to use in your garden.

4. Homegrown
Homegrown has a dictionary of over 250 herbs and vegetables. You’ll be able to see several in-depth growing guides on each of these plants. Once you pick your plants, it’ll help you track how they’re growing and your garden’s general progress. It’ll tell you how often you should feed and water your plants, and track the weather.

5. Gardening Companion
Gardening Companion is an app with thousands of gardening articles all in one place. You’ll find YouTube videos and photos on hundreds of plant varieties to help you along. Maybe you want to know how to plant your vegetables in optimal spots, or you need to solve common problems. You’ll find it all here. The app’s journal portion lets you track and share your garden’s progress.

6. GrowIt!
Get thousands of different plant species on your phone with this app. You can easily find the correct plant type for your location and needs. The app lets you set your chosen plants up to share, and you can post tricks and tips that remind you how to get the best results.

7. GrowSquared
This is a drag and drop planning tool for your garden. You can easily pick your plants and design your bed sizes. Set planting dates, and the app will tell you the best times to plant and harvest. You’ll also get details about a watering rotation, and it reduces your planning needs.

These seven gardening apps can help you maximize your garden’s yield and remove some of the guesswork. You can easily mix and match until you find the perfect app for your needs.

If you need more hands-on help with your gardening and landscaping, contact us today to see how we can help

04 Dec 2019
5 Holiday Ideas that Bring the Outdoors Inside

5 Holiday Ideas that Bring the Outdoors Inside

5 holiday ideas that bring the outdoors inside infographic

As the holidays come around, bringing the outdoors in can add to your festivities and get everyone in the spirit. These five tips can bring holidays inside without a mess.

Yuletide Pine Cones
Bringing pine cones in and sprucing them up is the perfect way to capture the holiday’s essence without a lot of fuss. Paint the tips of your pine cones white to mimic snow, and add a little glitter and bells for a festive look.

Holiday Wreaths
If you have them, go outside and gather evergreen boughs, pine cones, and ivy. You can weave these things together with a few sprigs of holly for a gorgeous wreath. Add a few ornaments to make it sparkle.

Roasting Chestnuts
Not only do chestnuts make great decor and smell wonderful, but they’re great decor. Cut a small slit into the chestnuts and pop them into the oven to roast them. You can add them to your dishes as well.

Make Holiday Centerpieces
Bright holly berries, evergreen boughs, and holiday baubles artfully placed in glass bowls make stunning centerpieces. Set them around your home to spread holiday cheer. You can even add lights to create eye-catching designs.

Add Lanterns
Nothing says the holidays like warm lantern light. Hang a few festive lanterns around your tree, hallways, or anywhere in your home to give soft light and guide your guests along.

When you’re ready to create a beautiful landscape that will always boost your spirits, contact us for a free quote today.

26 Nov 2019

What is Defensive Gardening?

What is Defensive Gardening

When people think of their outdoor security, things like CCTV cameras, lights, dogs, and fence placement all come to mind. They usually don’t think of the one thing almost everyone has in their yard. This is their plants. They’re green, attractive, and work wonderfully for defensive gardening. Defensive gardening is using plants to keep unwanted people out of your home or business.

First, you want to make sure you get rid of every hiding spot. You don’t plant your hedges to run along solid fence-lines because this gives people hidden pockets to sneak through. Move the hedges away from your home, as well. Thieves can use them to hide from the street view and break into your windows.

Don’t have any trees near your home that could give intruders easy access to a second-story balcony or window. Be generous when you think about reach. People can climb, or they can prop the ladder you left out up against the tree and get in that way. Either keep the trees away from your home or trim the tree’s limbs away from the house. This always prevents damage from storms or high winds.

Incorporating Defensive Gardening in Your Landscaping

Add tight hedges around your home. You want to make it tight enough that people don’t want to attempt to get through them. It may not stop a more determined intruder, but it’ll make them think twice when you combine these tight hedges with motion lights or CCTV cameras.

Incorporate plants that pinch into your landscaping. Holly plants grow in very dense bushes that prickle and pinch when you touch them. Many people plant them under their windows. Blackberry bushes will quickly grow into a hedge with small thorns that can scratch skin and tear clothing. You do want to make a point to prune these bushes back regularly, though, because the birds like it and they’ll spread more bushes throughout your property with their waste products.

Bougainvillea is a plant that grows up to 40 feet long. It grows sharp thorns, dangerous sap, and beautiful flowers. There are dozens of other types of plants you can use depending on your needs and the climate. Your local landscaping company can help you pick out the best choices. They can also tell you how to care for them.

Roses are pretty and functional choices. You can easily plant whole hedges of them, and they have climbing roses available to scale fences and drape over the top. Put one rosebush with large thorns under your window, and your window won’t be vulnerable to intruders anymore.

For people who live in a dry and arid climate like in the desert, they have a whole lineup of defensive plants available. Cacti and agave grow slowly, but planting them under your window gives you a built-in defense system that anyone will hesitate to take on.

If you’re interested in defensive gardening and incorporating it into your own landscape design, contact us. Our staff is happy to help find the best plants for your zone and climate to give you a beautiful and functional look.

12 Nov 2019

What Are the Five Biggest Landscaping Mistakes?

What Are the Five Biggest Landscaping Mistakes

No one likes making mistakes, but landscaping mistakes can be costly. We’ve picked out the five biggest landscaping mistakes you can make. This way, you know precisely what to avoid when you tackle your next landscaping project. Read on to see what they are!

Mistake One – Incorrectly Figuring Costs

When it comes to building a new home, many people forget to budget for landscaping or don’t figure their costs correctly. This means that you end up with a beautiful building and a barren yard. Before you start and build or renovation project, get estimates for landscaping costs. Although this is the last part of any project, it can pull your entire project together. Get a few estimates from different companies and price out everything you want.

Mistake Two – Not Having a Landscaping Plan

A landscaping plan outlines where everything will go to help ensure you get a cohesive look. It lays out all of your plants, shrubs, trees, and any features you’d like to incorporate. You can create centerpieces with water features or bright flowers and build your design around it. If you don’t have a plan in place, you can end up with pieces that don’t go together correctly for a very sloppy look.

Mistake Three – Planting Edging Straight Lines

Many people make the mistake of edging or planting in straight lines because they think it looks neater. However, flowers and trees don’t naturally grow in straight lines. Planting them like this makes them look fake. When you want to create an edge between your flower beds or shrubs, go for a slightly curved design. Plant your flowers in groupings instead of rows for a more natural look.

Mistake Four – Not Considering Maintenance

Unless everything in your yard is fake, you’ll have routine maintenance. Not taking this into consideration when you design can be a big mistake that causes you headaches all season long. Tight turns and small spaces for your mower to maneuver around, a lack of mulch, and too many flower beds to take care of gives you more work. You want to enjoy your hard without spending every day looking after it.

Mistake Five – Forgetting the Mature Plant Size

Not considering the plant’s mature size when you buy them is the final big mistake people make. The small shrub or tree you bought and planted will eventually grow. For example, if you have a small yard and plant a huge spruce tree, what will happen? Eventually, the tree will grow and start to obscure your view of the street. Many people plant their shrubs too close together or too close to the house and run into problems later. Double-check the size of anything you pick out and plant it accordingly.

Landscaping can be an expensive investment in your home, so it’s important to do it correctly the first time. Hiring a professional company can ensure you avoid these routine mistakes and end up with a beautiful yard or garden. Contact us to book a consultation today!

29 Oct 2019

Can You Use Artificial Grass as a Driveway?

Can you use artificial grass as a driveway? This is a question many homeowners ask when they’re considering landscaping or changes to their yard. The short answer is yes. However, the long answer is in moderation. We’ll outline how and why people would consider this unique driveway material next.

Why Use Artificial Grass in Your Driveway?

Artificial grass in your driveway is an eye-catching alternative to using boring concrete or asphalt. However, you don’t want to use just artificial grass because it’s not meant for large vehicles to drive on it over and over again like in a driveway.

People are realizing that they can create stunning driveways that boost their curb appeal quickly and easily. Additionally, artificial grass fights runoff. If you get a heavy storm with a lot of rain, it can cause your driveway to start to erode, buckle, and crack. Adding artificial turf on top of or around your concrete helps to hold in firmly in place.

Artificial turf boosts your home’s curb appeal as well! Anything that makes your home look more well-kept and tidy is appealing to buyers. So, adding a splash of artificial grass to your driveway makes you home look like you care about it. The bright green contrasts sharply with the concrete or asphalt, and you get a stunning look.

It’s very low maintenance as far as landscaping and yard options. Unlike traditional grass that you have to feed, cut, and maintain, artificial grass looks good year after year with no help from you. The trick is to be sure that you get a reputable company to do the install process because this directly impacts how long your new driveway will hold up.

For areas that go through droughts and have routine water restrictions, you’ll get a gorgeous driveway that looks stunning and healthy all year round. It doesn’t generate mud or pests, and this is important for your home’s aesthetics.

How to Use Artificial Grass in Your Driveway

The trick to using artificial grass in your driveway is to create a surface that uses a mix of hard surfaces like concrete and artificial grass. Popular design choices include creating squares or triangles of concrete surrounded by lines of artificial grass to create a checkerboard pattern. Other pattern ideas include doing alternating squares of grass and concrete.

Your goal is to get a mix of artificial grass and concrete that is aesthetically pleasing while being durable enough to withstand the weight of vehicles driving over it. The hardscape offsets the softer grass portions. In turn, you get a beautiful design. You can also let go and have fun with it. Your pattern can be whatever you like.

Contact Evergreen Landscaping for Artificial Grass Installs Today!

Are you ready to bring your driveway’s appearance up a notch and install your very own artificial grass driveway? Maybe you have questions about our products or processes. Either way, we can’t wait to hear from you! Reach out and contact us today!

09 Oct 2019

Is it True that Talking to Plants Helps Them Grow?

Is it True that Talking to Plants Helps Them Grow


You’ve most likely heard that talking to plants can make them healthier and grow faster. But is there any truth to these claims? This is the question we’re going to take on in this post, and you can take what you learn and try it on your own plants.

Do Plants Like You Talking to Them?

Many of you had an aunt, grandmother, or another relative that seemed to do wonderfully with all of their plants. Their soft talking to the plants as they watered, fed, and trimmed their beloved plants supposedly encouraged the plants to grow faster and stronger. Your relative was onto something, and you shouldn’t feel crazy if you talk to your plants. There’s actually a science to back up this practice.

There are dozens of studies that back up the fact that a plant’s growth is directly influenced by sound. When you expose your plants to sound at 70 decibels, there is an increased growth rate. Seventy decibels is the average conversational tone people use. Plant experiments involving exposure to music have touched on the benefits of talking to your plants, but does this mean you should start?

There is absolutely no harm to you to do so, and you may even give yourself a small boost psychologically. Spending time with your plants promotes good mental and physical health, and it’s calming.

Plants, Talking, and Science

The Royal Horticultural Society put out a study that proved talking to plants helps them grow faster. For one month, 10 gardeners read to a single tomato plant each day, and they compared the growth to a control group of tomato plants that grew in silence. At the end of the study, they found that all of the tomato plants that had sound grew taller than the control group.

Interestingly enough, the researchers found that plants that experienced women’s voices for the month grew an average of an inch taller than those plants which experienced male voices. This may not be strictly science, but it effectively ties back to the 1848 notion first hinted that plants could benefit from human sound. A German professor published “The Soul Life of Plants” to support his theory.

Benefits of Talking to Your Plants

Outside of the health benefits we touched on earlier, plants get several benefits when you talk to them. The first benefits plants get is in response to the vibration you create when you talk. This vibration influences plants to produce two key genes that make them grow.

A second benefit to your plants is that they get carbon dioxide when you breathe out and talk to them. This is a by-product of speaking, and plants use it for photosynthesis. This also helps them grow and thrive.

Contact Evergreen Landscaping Today!

Do you want to add a few plants to your landscape and see them grow and bloom? Perhaps you’re not sure which plants or shrubs would work best in your zone. Either way, we’re here to help. Browse our stock and reach out and contact us today with questions!